Worldbuilding and Roleplaying Concepts
 Art by Kerem Beyit, on ArtStation. Wrapping up Book 2 of my ongoing series converting Pathfinder's Kingmaker adventure path to Dark Sun, this post covers the 'big finale' and the bounty posters.
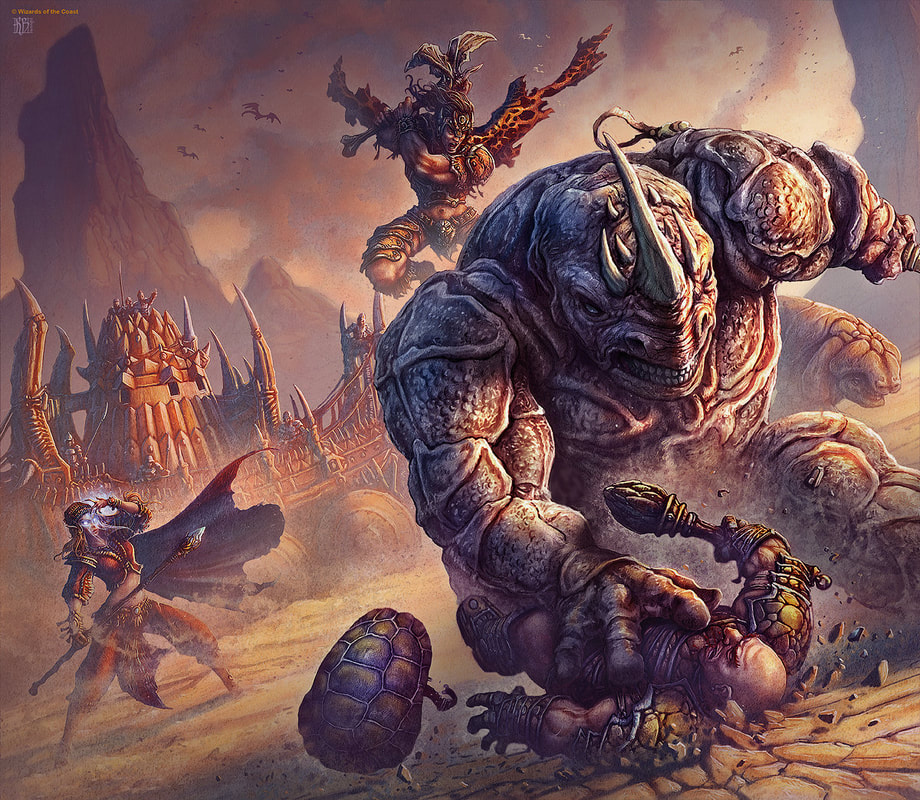
The climax of 'Sands Stained Red' begins with an attack on the PCs' home base. Give them a chance to build up their town before starting this part of the adventure, and time for a point when the PCs are all out of town- their return to town after finally defeating the B'rohgs is an excellent point to begin. Upon returning home, the PCs find their home in a shambles. Newly plowed fields have been torn up, trees have been knocked down, livestock has been slaughtered, and buildings have been flattened. A pall of dust and smoke hangs over the town, and the few people on the streets mill about in shock, as if they have just come from a war zone. If you're feeling like the PCs haven't put in enough effort protecting the town, kill off some of the NPCs you've populated it with. Be brutal here! The Braxat's trail can be followed to a small cavern complex beneath a rocky tor overlooking the Little Sellen Siltflow. Inside can be found a grove of dangerous violet fungi, a shambling mound animated by a druid decades ago and abandoned, and a nest of Caveweaver Giant Spiders, leading to a confrontation with the gigantic Braxat itself. In its hide is lodged a curiously-shaped dagger made of a single piece of solid bone, matching some of the other gear worn by a ravaged corpse in the corner. On the body can also be found a map which has the PCs' town location, and several other key locations, marked. This should clue the PCs in to the idea that there are larger forces aware of what is going on. The weapon was made by Nyrissa, the mad Pyreen, and gifted to her agent Eirikk, who met his demise at the Braxat's talons. Wanted Posters So-Ut Hunt Source: Wanted poster, backed by the Free City of Tyr Task: Rumours of a So-Ut rampaging the southern Narlmarches are probably (hopefully) overstated. But it's killing folks and needs to be hunted down. Completion: Find a So-Ut, kill it, and return to town with its head as proof. Reward: The council has approved a reward of 1,200 ceramic pieces to the first group to successfully slay a So-Ut in the Narlmarches. B'rohg Blood Source: Wanted poster, posted by Bokken the hermit. Task: Bokken says that blood from a B'rohg might be used to craft some powerful potion-fruits. Completion: Deliver a waterskin filled with B'rohg blood to Bokken. He doesn't need more than one waterskin, so one B'rohg should do the trick. Reward: Bokken promises to craft 1,200 ceramic pieces' worth of potion fruit, delivered in about a week. Howls of the North Wind Source: Wanted poster, backed by the Free City of Tyr Task: A ferocious pack of Dune Reapers stalks the Kamelands! Completion: Slay the Dune Reapers and display their bodies at town. Reward: The council has approved a reward of 1,200 ceramic pieces to the heroes who slay the Dune Reapers. Shamblesap Source: Wanted poster, posted by Bokken the hermit. Task: Shambling mounds aren't common in the Verdant Belt, but they're not unheard of. Bokken posits that the sap of a shambling mound could work wonders for cultivating certain medicinal herbs, and asks for one shambling mound's worth of sap. Completion: Deliver the sap to Bokken. Reward: Bokken can pay 600 ceramic pieces for the sap, as well as three powerful Cure Wounds potion-fruit. Where's Tig? Source: Tig Tanyrsen's distraught parents. Task: Young Tig is a well-known handful, always collecting "pets" down by the silt flows. He has been missing for several days, and the townsfolk are growing concerned. Completion: Rescue Tig from the Ssurrans who have captured him with the intent to eat him. Reward: The town's Loyalty is increased by 2. The Horror, The Horror Source: Wanted poster, backed by Arven the dune trader. Task: The ill-tempered and old Silt Horror has moved into Arven's scavenging-territory. Completion: Kill (or drive off) the silt horror Old Crackjaw fom Arven's scavenging area. Reward: Arven finds things of all sorts; he'll give whoever helps him a Ring of Feather Falling. Also posted on Game Masters Stash on 30 October 2020. 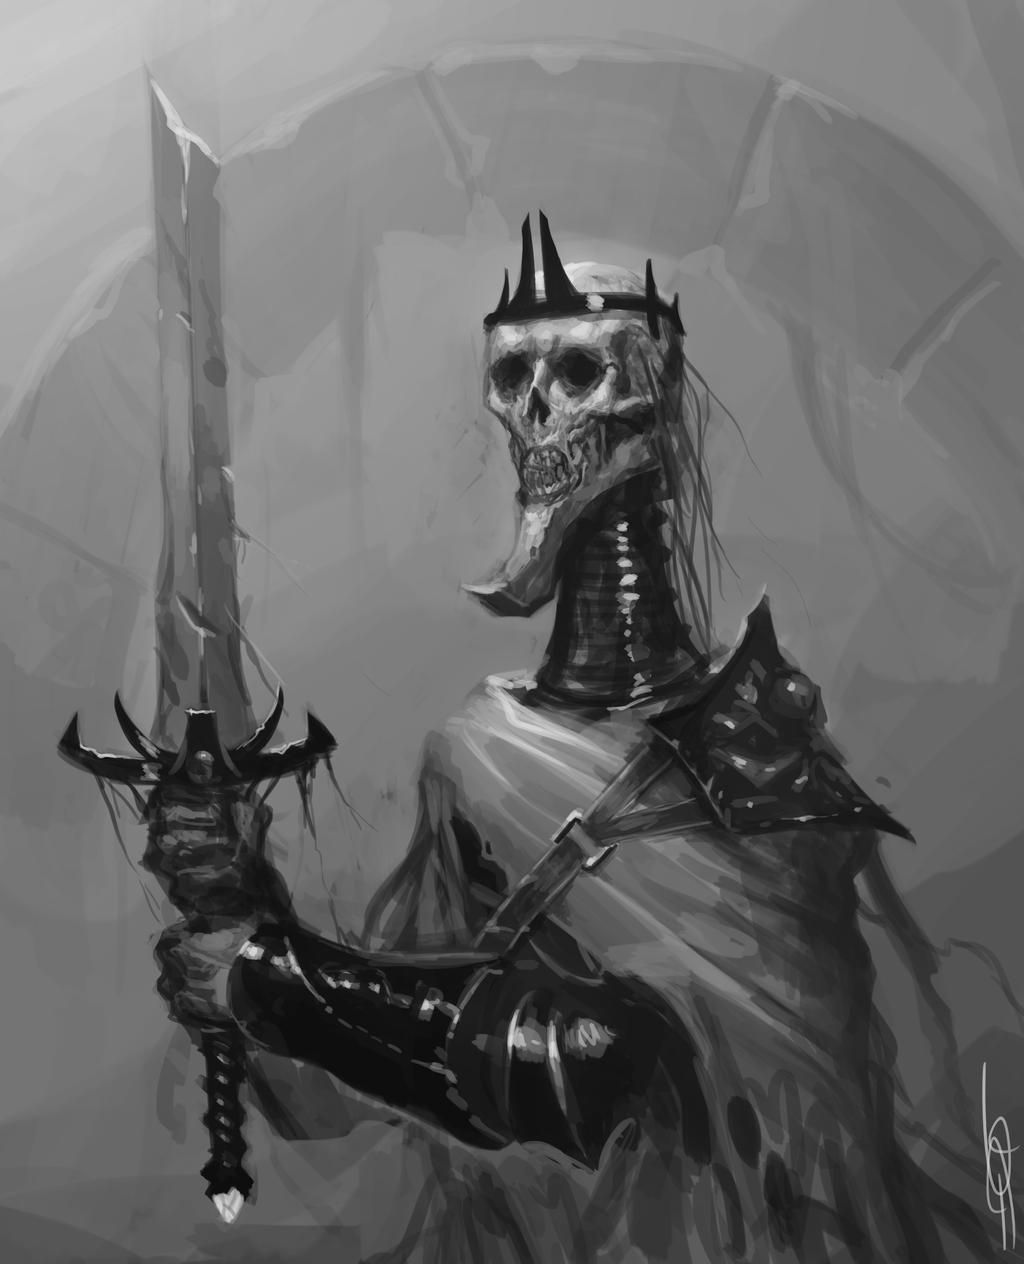 Art by MorkarDFC, on DeviantArt. Part 3 of the series converting Pathfinder's Kingmaker adventure path will cover the next three chapters of the game: The Lonely Barrow, the Forgotten Keep, the Isle of the Lizard King, and Troll Trouble (renamed to "B'rohg Bother").
The Lonely Barrow This ancient barrow at location F holds the tomb of a warrior who was betrayed by his lieutenant hundreds of years ago, and his raw hatred transformed him after his death into a rageful thinking zombie. The powerful warrior was interred with his own loyal guards, poisoned and buried with him, and has raged for years, breaking his prized weapon against the interior of his own tomb. Now, the tomb has been uncovered by seismic activity, and a chance has come for him to be free. The remains of the Lonely Warrior's iron breastplate and trappings could be recovered and reconditioned, with some work, and his broken sword (or other weapon, if you'd prefer to introduce something else) could also be the base for a powerful weapon for one of your PCs, as long as they work for it. The Forgotten Keep This ancient elven keep, located at area G, if from before the Cleansing Wars, and was abandoned in an age past. The archaic enchantments have long worn away, but the architecture and some of the installed traps have survived the test of time. It is now inabited by a trio of murderous creatures in some kind of supportive symbiosis: a horrid T'chowb, which psionically drains the mind from its victims; a Su-Monster making its home among the Assassin Vines climbing the walls; and a vile Baobhan Sith fey who titles herself the Dancing Lady. She preys upon living creatures, eating their flesh and drinking their blood. The treasure of the elven keep and the fey include the proceeds of several explorers who the creatures have murdered. The Isle of the Lizard King A small tribe of Ssurrans have made their home on an island in the silt flows at area N. Although sluggish in the winter season, they become lively and go raiding during the warmer weather. They will happily eat the flesh of the so-called "civilized" races but are also happy to eat other flesh instead, and their 'king', Vesket, worships a predatory Will-O-Wisp. The Ssurrans might be trading partners, or might become enemies, depending on the PCs' actions. B'rohg Bother The pyreen-princess Nyrissa recently spured on a gang of B'rohg in the southern Verdant Belt into terrorizing the locals and generally causing chaos in the region to further her own mysterious plans. Under the leadership of a violent warrior named Hargulka, the B'rohg have settled in an ancient Dwarven stronghold in the southwestern Narlmarches at about the same time this adventure begins; as it plays out, their attacks grow more and more numerous, leaving ripples of discord and terror in their wake. The B'rohg have a pair of Athasian Sloths as 'pets' kept on long leather ties, which they unleash on those challenging them. One of the B'rohg, Nagrundi, is a brute with strong telekinetic wild talents, while another, Kargadd, is an escaped Gladiator who wears a set of damaged chitin armour. Hargulka himself is a warrior who has fought his way across the wastes for many years. His fighting skills are impressive, and he does battle with a deadly greatclub studded with shards of razor-sharp obsidian. Also posted on Game Masters Stash on 23 October 2020. 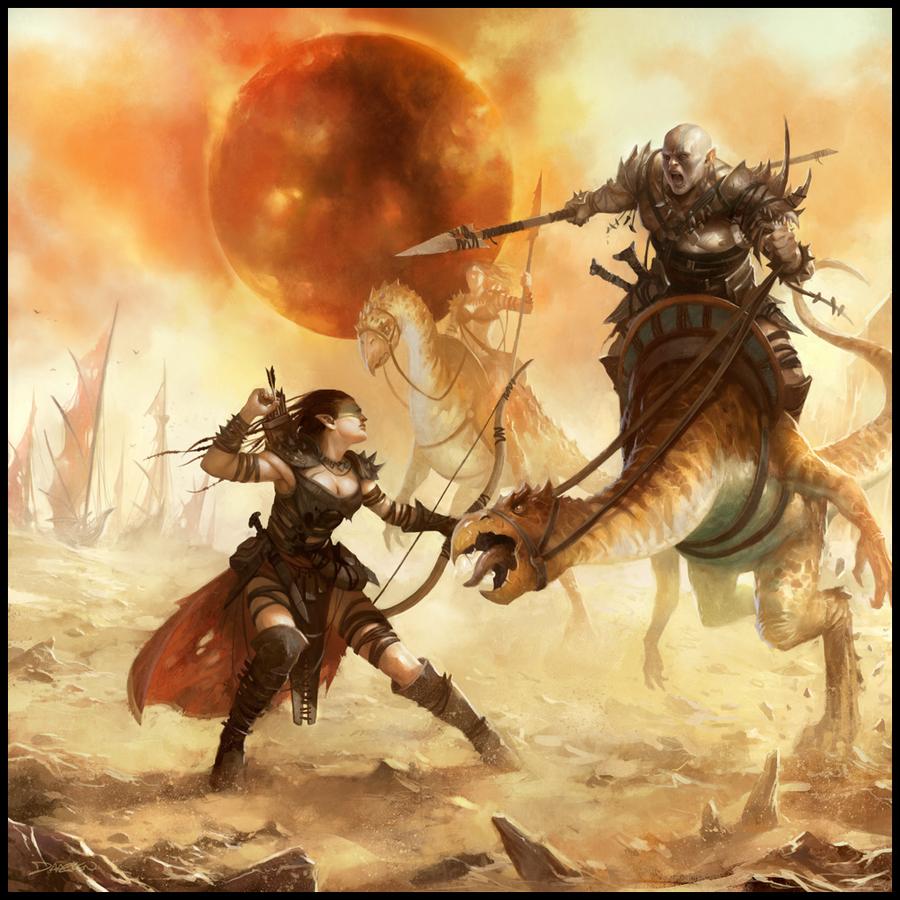 Art by Mike 'daarken' Lim on DeviantArt. Part 2 of Sands Stained Red, my ongoing adaptation of Pathfinder's Kingmaker adventure path series, deals with the 'meat' of this adventure, and some wider areas to explore. Even if you're not using this as part of the adventure path, some of these could be useful as isolated encounters or locations for your Dark Sun game.
This part deals with the PCs having a larger area to explore, and establishing much more of a presence in the Verdant Belt. The challenges will vary in difficulty, so PCs will have to be cautious and not simply blunder into everything they can see. A: The Grove of Tiressia This forested glade, with a small dwelling built by the pond, is the home of a peaceful half-elf Druid and her lover, a wounded Mul warrior by the name of Falchos. Unlike Bokken, Tiressia is much more cautious about having her peace disturbed, but could do with a hand, and explains that the dangerous Scythe Tree is trying to kill them. She is willing to pay them in some enchanted items, and/or helping to inform the PCs about what's going on in the Narlmarches, which can help with their new settlement's Stability score. B: A Delicate Situation The PCs encounter a logging party being held at bay by an aged Thri-Kreen, its eyes milky and its carapace faded. The loggers, led by a Dwarf named Korak, insist that the strangely-bobbing Thri-Kreen came out of nowhere, caught arrows fired at it, and attacked them, and is getting in the way of important business. The Thri-Kreen, a monk named Ch'k'klak, insists as well as it can that the loggers should leave the area, and should value the trees they fell.This gives the PCs a moral quandary to overcome, and a choice between individual importance and the progress of civilization. C: The Narthropple Expedition Since Gnomes aren't a part of Athas, and their whimsical tone doesn't fit well at all, these can be enother expeditionary party, in grave danger and need of urgent rescue if the PCs want to make an ally. The road has caved and fallen down into the silt below, and the howdah containing the expeditioneers and their belongings is sinking swiftly, as the distressed Mekillot is thrashing hard. Jubilost, the expedition's leader, was thrown free, and waves or calls out if he can see people approaching. However, the thrashing is causing attention from a large Silt Horror, which can be seen approaching. If the PCs assist, they'll be endangering themselves, and potentially taking on extra mouths without any of their supplies or belongings. D: Sun Lord's Fort The PCs will have visited here in the first adventure, Stolen Land. The ruined fort makes an ideal place to base their new settlement. E: On the Prowl The Kamelands are full of predators and hungry beasts. A pack of three Dune Reapers are one such threat, consuming their way across the land. F: Lonely Barrow (detailed in Part 3) G: Abandoned Keep (detailed in Part 4) H: The Blighted Hollow This area reeks of defiling magic, and contains a horrid magical plant called the Scythe Tree. It is able to absorb magical energy from the nearby area in a similar manner to defiling. Among its roots can be found scattered bones and remains. I: The Mad Hermit Bokken's younger brother is a manic and dangerous wild man, given to tormenting people he comes across, with his 'pet', a Dagorran he has imprinted upon. He prefers to attack with surprise, but if others run across him, he pretends to be an old, lonely hermit Druid, and makes vague promises of helping them. J: The Waste Witch In the silt flats there is a small house, inhabited by an aged Psion. She has a bad reputation, but mostly just wants to be left alone. She is extremely knowledgeable about the area of the Kamelands, and can warn them... if they respect her privacy. Otherwise, a spindly crystal golem which she has painstakingly built over the last few decades can protect her. K: Old Crackjaw's Den A great and ornery Silt Horror dwells in the silty cave here, angry at its long imprisonment after the silt shallows marooned it in this area. L: Gurdin Silt Ford Normally quite deep along the majority of its length, the silt becomes quite shallow here, creating a navigable ford across its width. M: Chathrang Den In a grove of bamboo littered with splintered sticks and crushed bones dwells a Chathrang. The dangerous beast attacks any who approach, harpooning them and dragging them back to its lair to be eaten. N: Lair of the Lizard King (detailed in part 5) O: Candlemere Tower This ancient ruin on an island in the middle of a wide lake of water, built during the Champions' War, is overrun with viscious nettles that cause paralysis, as well as dozens of Will'o'Wisps - psionic remnants of the folk who dwelled here. If cleared, the keep can be established as a dwelling-place, although it may draw attention. P: The Mud Bowl This strange, 20-foot wide bubbling caldera of mud is heated by geothermal activity, and large mounds of fungus and mushrooms grow here, which can be used to feed a large group if necessary. However, a Tendriculos, a dangerous fungus-beast, will attack any who lurk nearby. The Wastewitch would like some of these mushrooms, if they can be provided. Q: A Cry for Help A harem of the cruel beasts known as Sand Brides lurk in this area, using powers of illusion to lure travellers with cries for help and staged attacks before turning on them to crush them to death with their sandy limbs. Among their treasure is a breastplate made of blue drakehide, a very fetching and eye-catching piece. R: Hargulka's Stronghold (detailed in part 6) S: Master of the Forest A lone So-Ut rampages its way through the canyons here, picking apart pils of stones and hurling them against one another. It is a violent, unstoppable beast that is best avoided. T: The Wandering Giant A lone beast-headed giant named Munguk is looking for blueberries to ferment and eat, game to hunt, and a mate, preferably in that order. While he is dangerous, the giant with the head of a great black-eyed shark is confused and cranky, and if he is offered friendship (and preferably some alcohol), he may share some advice about the area before meandering off to the East on his own. U: Abandoned Ferry Station Half-collapsed, rotting wooden buildings stand on each bank of the silt flats here. The buildings have previously been used as hideouts for halfings, Gith, and bandits, changing hands many times. They can be cleaned and reinhabited, making a good place to settle. V: Braxat Lair (detailed in part 7) Also posted on Game Masters Stash on 16 October 2020.  Art by SOLIDToM, on DeviantArt. Continuing the ongoing Sorcerer-Kingmaker series, adapting Pathfinder's Kingmaker adventure path to the Dark Sun campaign world. This will be the first part of Book 2, adapting the Rivers Run Red module. 'Sands Stained Red' seems much more appropriately thematic, so I'm going to lean into that.
Picking up from Book 1: Stolen Lands, the PCs will just have cleared out the Verdant Belt of bandits, and hopefully made some allies. However, they'll be running into trouble set up by the mad Pyreen, Nyrissa, including a band of marauding B'rohg and other issues. At this stage, it may be appropriate to 'jump forward' a few months, as dwellings start to spring up around Oleg's Trading Post or further into the Verdant Belt, if it's safe enough. This adventure takes place over the course of about a year, so there should be some down-time in between adventuring out into the wilderness. Event 1- The Slain Townsfolk: The first time the PCs return from going out into the wilds, they discover that several townfolk have been slain, one at a time. A wild Tembo has been preying on the area, and the PCs have a chance to hunt it down, at great risk. Event 2 - The Rabble Rouser: The second time the PCs return from the wilderness, the discover a new threat in town. The charismatic speaker is a spy and agent provocateur sent by the City-State of Urik to undermine their rule over the area. He avoids immediate conflict, preferring just to stir people up against the rule of Tyr. This can increase the Unrest score for the area. Event 3 - The Cult of Cold Malice: The third time the PCs return from the wilderness, the local weather has started to turn against them, with destructive Tyr-storms lashing the area, although small in intensity. With investigation, they can discover that this is due to the influence of a small (but growing) cult of the domain of Cold Malice, who worship the element of Rain. These individuals carry small fulgurite charms, made when lightning fom a Tyr-storm has struck sand and formed a small glass shard. The PCs may have to interrogate or interview a number of civilians to find them, which may cause more Unrest to accumulate. Minor events: Siltford Founding: A pair of Dune Traders, Loy Rezbin and his wife Latricia, want to set up a new township as well, bordering on the silt flats in around the area where the PCs fought the juvenile Silt Horrors earlier (area U). They will front a substantial amount of the cost involved, and are willing to send a tithe on to the PCs for their help, making them useful. They'll found Siltford, which will be a part of the fourth adventure. B'rohg Sightings: Rumours of B'rohg marauders through the area spread, causing a slow panic to build. The PCs may have to stir up some Loyalty to combat the Unrest that builds. To be continued next week! Also posted on Game Masters Stash on 9 October 2020.  Art by nogoattaco, on FurAffinity. The final post covering Sorcerer-Kingmaker: Stolen Land covers the wanted posters which PCs can learn of, and hunt down for ceramic coin.
Wanted: Bandits Source: Wanted poster at Oleg's Trading Post, backed by the Council of the Free City of Tyr Task: The bandits in the Verdant Belt need to be shown that their actions will not be tolerated. Capture or defeat at least six of them to send a message. Completion: At least six bandits defeated completes this quest. Reward: One week after proof is provided, bandit activity is noticeably affected, and the Council sends a reward of 400 ceramic coins. Halflings in the Hills Source: Wanted poster at Oleg's Trading Post, backed by the Council of the Free City of Tyr Task: The Sootstripe halflings dwell in a cave somewhere in the Kamelands. Normally not a problem, they've been riled up by something lately. Find their tribe and ensure they aren't going to continue being a threat. Completion: Either slay the halflings or forge an alliance of peace with them. Reward: The Council of Tyr sends a reward of 800 ceramic coins once they have proof that the halfling tribe is 'under control' and won't raid caravans any longer. Wanted: Silt Horror Source: Wanted poster at Oleg's Trading Post, backed by Oleg himself Task: The way everyone talks about Silt Horrors, you might think they're everywhere through the Silt Flats. This isn't the case here; they seem to be pretty rare. A Silt Horror for display would be a great conversation piece at Oleg's. He promises a reward for anyone who can bring him one. Completion: Slay one of the juvenile Silt Horrors and deliver its head... if you can work out which bit that it. Reward: Oleg will pay 600 ceramic coins for a relatively undamaged Silt Horror corpse or head. Wanted: Old Tuskgutter Source: Wanted poster at Oleg's Trading Post, backed by Vekkel Benzen, a crippled Elf who makes his home at the Trading Post. Task: Every hunter in the Verdant Belt has a story about Tuskgutter, each more wild than the last. Whoever manages to kill the ill-tempered beast will get a nice reward from old, retired Vekkel Benzen, who lost his leg to the monster Bazraag a year ago and can't participate in the Run anymore. Completion: Deliver Tuskgutter's head to Oleg's. Reward: Vekkel has promised a sheaf of six +1 Giant-bane arrows (as the Giant slayer magic weapon) and his finely-made longbow, strung with giant-hair and made of a single carved rib-bone, to whoever can kill the giant Bazraag. He also plans to roast the oily flesh and eat it. Gathering Fangberries Source: Crazy old Bokken Task: Bokken's something of an eccentric, but he knows how to make delicious potion-fruits. His secret is growing them with fangberry juice, but he's running low. A large thicket of fangberries grows about 55 miles southwest of Oleg's Trading Post. Completion: Bring Bokken enough berries to water seven potion-fruits (about a basket-full). Reward: Bokken can brew a free Potion of Healing, and might be able to brew more complex potions, if he's brought other ingredients. Wanted: Moon Cactus Source: Svetlana, at Oleg's Trading Post Task: The food at the trading post is serviceable, but a little plain. Svetlana would like to expand the range, and wants enough of the rare Moon Cactus from about 16 miles south of the trading post to start a garden of them, letting her use their tasty flesh for a variety of recipes. Completion: Bring three sacks of the Moon Cactus to Svetlana, which will be enough to enough to plant the garden, if the Bazraags nearby haven't eaten them all. Reward: Svetlana can pay 10 ceramic pieces a week from the trading post's sales for the next six months. Svetlana's Ring Source: Oleg, at the Trading Post Task: Although Svetlana says it's not a great loss compared to what the Sun Lord's bandits could have taken, Oleg is furious that the bandits were rude and have disrespected him so much. She's forbidden him from risking his life and limb to recover it, but if anyone's willing to seek it out, Oleg will be very grateful. Completion: Track down the ring. The bandits were the last to have it, but they might have sold it or lost it already. Reward: Oleg has promised to open an account worth 1,000 ceramic pieces for someone who returns the ring to him. Wanted: Falgrim Sneeg Source: The dune trader Kesten Garess, at Oleg's Trading Post Task: A mercenary who worked for Kesten months ago was a Tyrian named Falgrim Sneeg, a grey-bearded wretch with a violent scar down the right side of his face. He slew two other guards and stole Kesten's money-chest, fleeing into the Verdant Belt after squandering his riches. Kesten wants him captured and returned to Tyr for justice. Completion: Capture Falgrim Sneeg, now one of the Sun Lord's bandits, and bring him back alive. Reward: Kesten arranges a delivery of four masterfully-made weapons of any kind (+1/2 of the wielder's proficiency bonus on attack rolls) as a reward from his trading-house for capturing the bandit alive. If he is brought in dead, Kesten regretfully arranges for one such weapon. Either way, these are delivered in around a week. Also posted on Game Masters Stash on 2 October 2020. 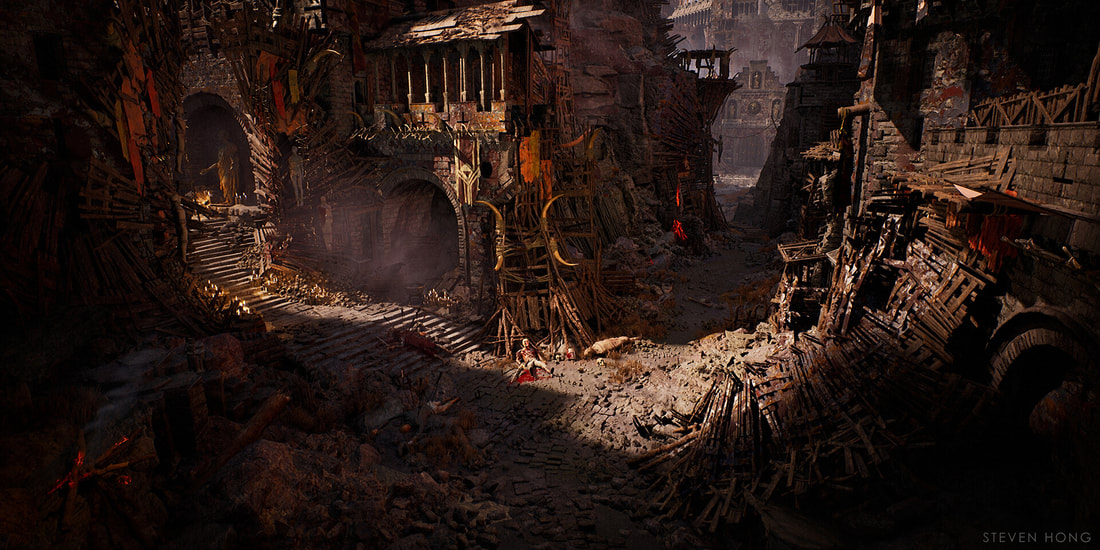 Art by Steven Hong, on ArtStation. As part four of our ongoing adaptation of Pathfinder's Kingmaker adventure path, today's post will deal with the culmination of the first book, and confronting the chieftain of the bandits, the mysterious warrior known as the Sun Lord!
The brutal survivor now known as the Sun Lord was raised in misery by his father, a cruel and misanthropic traveling druid who came to rule a group of wild and outlandish bandits. He was beaten often, and starved and thirsty most of his life, and learned cruelty and toughness at every step. When he became a man, he was visited by a Dream, a psionic vision wherein he was visited by a blindingly beautiful woman who left him a lock of her hair, and tod him to fight back. Filled with the anger, spite, rage, and vengeance that had built up over nearly two decades, he beat his father to within an inch of his life and brutally took control over the bandits. His power and rage quickly cowed other bandits nearby, and over the next dozen years, he became respected as well as feared, drifting south to the Verdant Belt. Here, in a ruin, he discovered the mask that now defines his life- a ceramic mask imbued with psionic enchantment allowing him to focus his battle-mind, and to move like dry lightning across the scrub. Once he placd this on his head, he assumed the identity of the Sun Lord, and has not removed it since, although his hopes of building an army worthy of challenging the Sorcerer-Kings have been undermined by his drunkenness and lack of any kind of discipline. His rage and combat prowess is certainly impressive to bandits, but he has no formal training or knowledge of how to organize people, and finds trying to run the camp very frustrating and challenging. His lieutenants, a trio of rough-and-tumble bandits each themselves in charge of a smaller gang, are important and control different parts of the camp and the Sun Lord's operations. These three are: * Akiros Ismort, an exiled former Templar. Akiros was exiled for having slain the husband of his lover in a fight, and fled the city of Tyr. While he has lived a rough life for several years, he yearns for civilized places and to be accepted again. His organizational skills are more useful than his combat prowess, to be honest. If he senses that the battle is turning against the Sun Lord, he will declare himself with the PCs, casting off his necklace and turning his mace on his former companions. * Auchs, a Tarek who escaped from a slave caravan years ago. A devout follower of priestly magics, he believes that the Sun Lord's father has marked his son as special, and listens to his commands. He is a skilled warior, and carries a clutch of javelins, attempting to pin foe down and then close to range. * Dovan from Nibenay, a tattooed half-elf with an obvious taste for pain and cruelty. He has a talent for manipulation, and had been planning to murder the Sun Lord and take his position with Auchs' help. The Sun Lord's Fort The fort is a run-down old stone fortress which once belonged to the city-state of Kalidnay, and was lost to the sands when the city-state ended abruptly. The bandits have made some ad-hoc repairs, but do not have the manpower or resources to properly restore it. The hillside at the front of the fort has a large tree which is the lair of a flock of Kestrekels, fed scraps by the bandits. They raise a racket if anyone approaches, and dive upon anyone who doesn't offer them food immediately, attacking as a swarm and tearing strips from anyone unlucky enough to draw their attention. The bandits are generally scattered about the fort, but will be roused to alertness by Akiros if the alarm is raised. If things are particularly dire, they'll unleash the Fordorran that was captured a few months ago, and set it on their attackers (replacing the Owlbear written into the adventure). The Sun Lord himself spends most of his time in his quarters, reeking of stale Broy (alcohol made of Kank honey) and Sapwine. A predator and terrorist of ruthless reputation, lately he's isolated himself, partaking in fewer raids and letting his lieutenants do his work for him. The flesh of his entire face is hideously scarred left by acid burns he suffered as the result of his father's torture. The Sun Lord, Bandit Captain Medium humanoid (human), Chaotic Evil Armour Class 15 (partial scale mail) Hit Points 78 (12d8+24) Speed 30ft. Str 16 (+3); Dex 16 (+3); Con 14 (+2); Int 12 (+1); Wis 9 (-1); Cha 13 (+1) Saving Throws Str +5, Dex +5, Wis +1 Skills Athletics +5, Intimidate +3 Senses passive Perception 10 Languages foul Common, Dwarven Challenge 3 (700xp) Rage. At the start of his turn, the Sun Lord can gain a +2 bonus to damage on melee weapon attacks for that turn, but attack rolls against him have advantage until the start of his next turn. Actions Multiattack. The Sun Lord makes three melee attacks with his whistling maces. Whistling Mace. Melee weapon attack: +6 to hit, reach 5ft., one target. Hit: 7 (1d6+4) damage. Battlemind. The Sun Lord's wild talent is focused by his psionic mask, allowing him to predict opponents' movements and reactions. As a psionic bonus action, he can concentrate to gain advantage on melee weapon attacks until the start of his next turn. This ability refreshes after a short rest. Psychoportation. As a psionic bonus action, the Sun Lord can teleport up to twenty feet in a flash of light. Attack rolls made against him until the start of his next turn have disadvantage. This ability refreshed after a short rest. Reactions Brutal Critical. The Sun Lord rolls one extra weapon damage die when determining the extra damage for a critical hit with a melee attack. The Sun Mask which the Sun Lord wears is an ancient item bearing psionic enchantment, and allows him to use the Battlemind and Psychoportation powers. Anyone taking it from him can attune to the mask, and gain the powers themselves. In the fort's cellar, the Sun Lord's father, a decrepit and miserable old Druid by the name of Nugrah, dwells. He spends most of his time crafting twisted fetishes and haunting the darkened cellar. Although he has the power to heal wounds, most of the bandits avoid him unless they fear for their lives, terrified of the creepy old man. The bandits' substantial treasure can be found in the cellars, and might be highly useful to the PCs in establishing their own home in the Verdant Belt. Although the bandits are currently held together by a combination of greed and fear of their leader, they quickly rout if the Sun Lord is defeated, and flee into the wilds to be devoured by Anakores, Braxats, and the like. This does substantially make the Verdant Belt safer, but allows the PCs to explore more easily before moving on to the next adventure- Rivers Run Red. Also posted on Game Masters Stash on 25 September 2020. 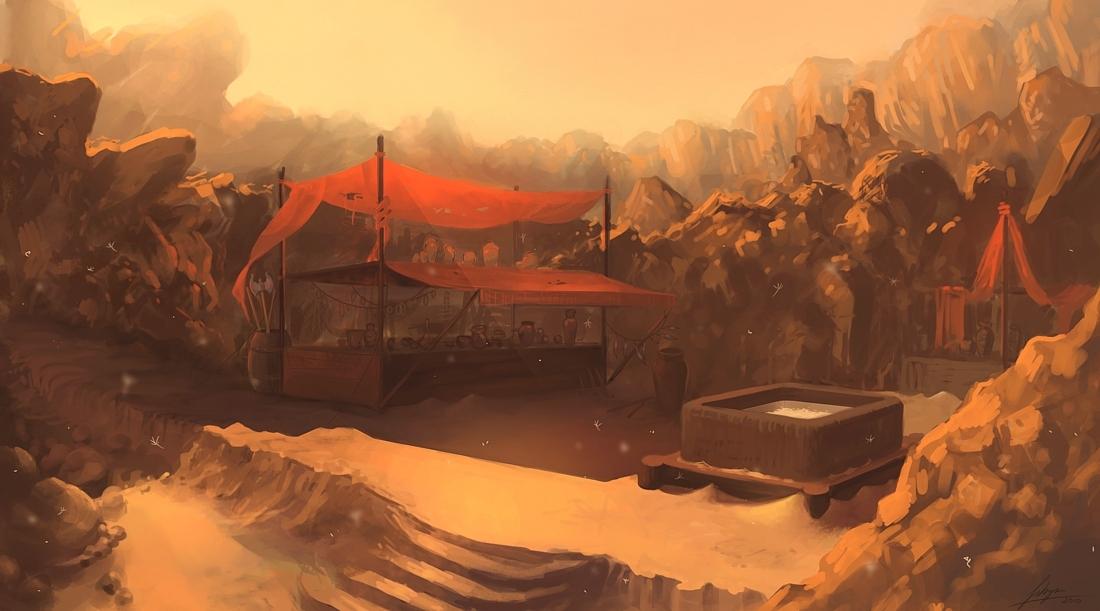 Art by freelancerart, on DeviantArt. Part 3 of the ongoing Sorcerer-Kingmaker adventure path adaptation deals with a few sections: The Thorn Ford bandit camp, the Gith Lair, and the Sootstripe Halfling tribe.
The Thorn Ford Bandit Camp Part 2 dealt with the larger Verdant Belt area, and included several areas that forded or crossed the silt shallows. The Thorn Ford bandit camp is one such of these, cut out of thick thorny growth and the secure rest for Happs' buddies, as well as his second-in-charge Kressle, a scrappy and dangerous escaped gladiator who fights with a pair of bone wrist razors. She is backed up by a disparate group of 4-8 bandits, using javelins, dejadas, and stone knives. Their treasure consists of a variety of ceramic and silver coinage, some jewelery, a carved wooden music-box, some crates of animal hides, and a crate of valuable liquor siezed for the Sun Lord himself. If given the opportunity, the bandits will talk about their boss, a hardened man who's an absolute monster in combat. People have seen him block blows that no-one saw coming, sieze the blade of a spear between his palms, and that he runs an old fort near the north shore of the Tusksilts. They might even share the passphrase, which is "By the bloody bones of Gilmorg, who wants to know"". They're scared of him, but they also respect his power, and they're also afraid of the creepy old man kept down under the fort. The Gith Hive Looming over all the hills in the northern Kamelands is an ancient and colossal baobab-type tree, visible for miles around. Its gnarled roots hide the lair to a hive of Gith which plague the area, and have long been at war with the Sootstripe Halfling tribe who live about 12 miles to the south. There are about 31 Gith living here in total, all combat-effective, although not all of them are present at once. Recently, the Gith stole a tribal relic of the Sootstripe halflings for the third time in as many months. It is an unusually common sight to find dead and stripped halflings and Gith in between their various locations, slain by one another and looted thoroughly. The caverns beneath the old tree are winding and narrow, and any attacks with reach weapons, or opportunity attacks, have disadvantage. The Gith craft all sorts of horrid traps, including shaved thorn caltrops, springy roots with sharp stone blades mounted into them, and small ceramic pots of centipede-scent, which will almost instantly (within 1 minute or so) draw attention from any of the creatures nearby. While they use several within their dingy hive, they craft many more here for use in the wastes. In the hive can also be found a captured Sootstripe halfling named Mikmek, who was captured perhaps a week ago and has been tormented, starved, and poked with sharp sticks for fun, along with three of his (now dead) companions. Mikmek only speaks a little of the Common tongue, and in broken tongue will explain that he was caught trying to rescue the tribal relic. If handed a weapon (or allowed to pick one up from the ground), he will be a loyal companion to the PCs, at least until they reach the chieftain of the Sootstripes later. In the middle of the hive is a great chasm where a vast centipede dwells, bridged by knotted roots and vines. The Gith gleefuly clamber between them, whooping and hollering, but PCs are likely to have difficulty navigating this with any speed. In the depths of the hive can be found a war-room containing the Gith war-leader, Grabbles, who is skilled in combat and with psionic powers. This room holds the halflings' relic, a masterfully-carved wooden statuette referencing dozens of their shared tribal legends. The Sootstripe Tribe The Sootstripes, a tribe of halflings who make their home here in the Verdant Belt, tattoo a black stripe across their eyes. They have been losing members of the tribe to the Gith attacks and bandit attacks, and cannot afford to fight another war against colonizers. Chief Sootstripe is engaged in a political struggle with Tartuk, a halfling who fled from a death sentence in Raam due to being caught engaged in several criminal enterprises at once, and has been making a living drifting from tribe to tribe before he can be caught, selling some into slavery and setting others at war with forces they cannot hope to win against. He has been manipulating the Sootstripe tribe for the past few years, and although they are growing suspicious of him, they care enough about their tribal traditions that they haven't gone against him yet, although there is definite tension in the tribe. All in all, the tribe is down to about 20 living members, and are desperate for new blood and some peace. If the PCs can offer some of those, Chief Sootstripe is more than happy to make an alliance with them. Tartuk has some minor psionic talents, but is an experienced alley-knife and social manipulator. He has suborned several of the Sootstripe halflings to utter loyalty to him, and even returning the relic to Chief Sootstripe will cause a violent struggle between the factions. The tribe's treasure consists of a wealth of coins, seven doses of Oil of Impact, a pair of Boots of Sneaking, and a soiled leather pouch containing the treasure stolen from the Gith, including Svetlana's ring. Once these areas have been dealt with, the PCs have the opportunity to have gained some clues about their enemies, dealt with some dangerous pests, and made some allies, leaving them in a good situation to take on their next target- the Sun Lord himself. Also posted on Game Masters Stash on 18 September 2020. 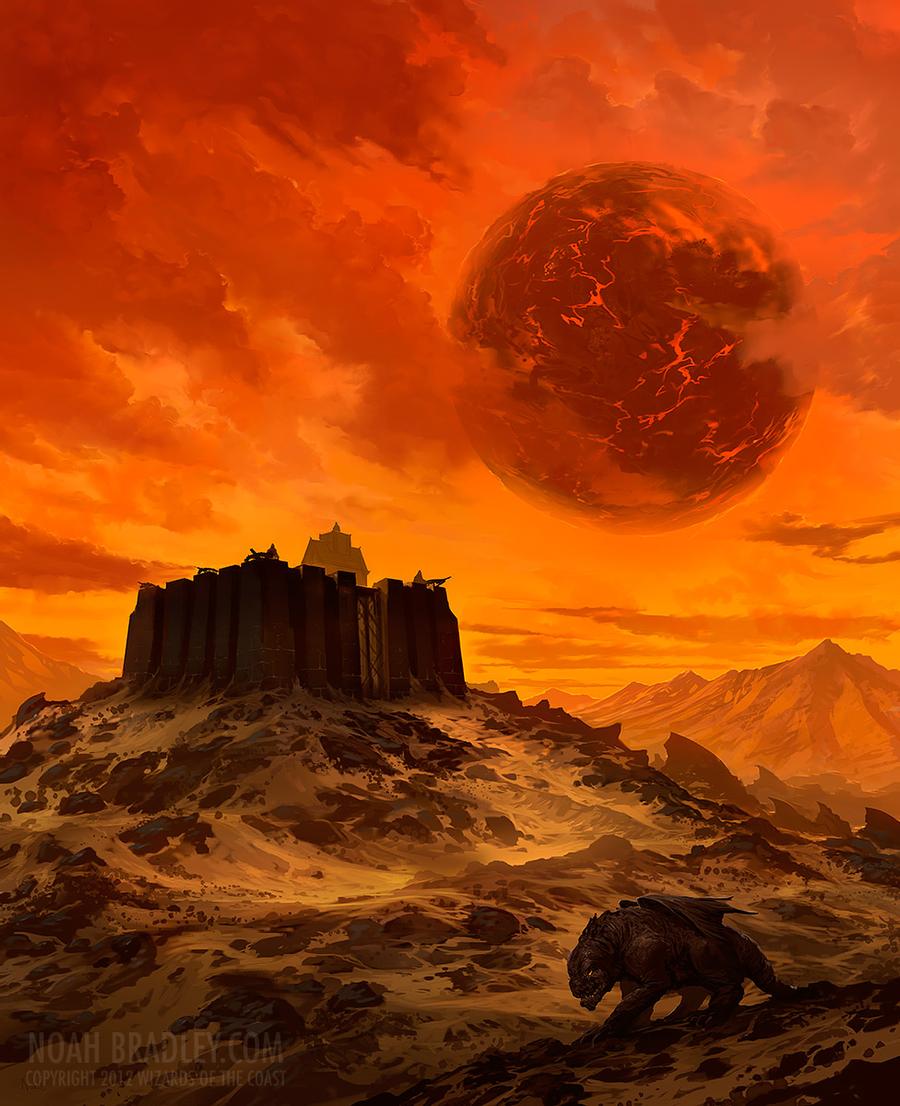 Art by Noah Bradley, on DeviantArt. Part Two of converting the Pathfinder: Kingmaker adventure path to Dark Sun for 5th edition D&D. As always, let me know if I've goofed, or if you there's something specific you want to see!
In my last post, I left off at the end of Part One of Stolen Land, with the PCs having just dealt with a small grou of bandits. From here, the options open up, and the PCs have a larger area of the Stolen Lands opened up to explore, this area being the Verdant Belt (I can't resist the callback to Troy Denning's The Verdant Passage, and it fits "the Greenbelt" just so perfectly). I think it's best if we assume that the Verdant Belt is an area with some scrubby vegetation, and a few trees- not the full-on rainforest of the Forest Ridge, but still a fertile place that's quite desirable to settle in. If there are settlers following the PCs by a few days or weeks, this gives them a good place to have other members of their 'character tree' - replacement or alternate characters who can substitute in if one of them is killed, or ends up not being what makes someone happy to play. I'll go location-by-location: A. Oleg's Trading Post: We briefly touched on this in the last post- it's a smallish trading post, probably a one or two-storey adobe building with some light walls and stable for a few kanks. With the immediate threat of Happs and his bandits gone, the trading post is likely to start expanding as more people come through the area. Jhod Kavken, who arrives after the PCs, is a elemental cleric of Earth who arrives after the PCs, seeking some moral calm after lynching someone who accidentally turned out to be a Defiler. He might ask the PCs to seek out and clear the Temple of the Rock Drake, later. B. Warrior's Cairn: This cairn once housed a powerful lieutenant of one of the Champions of Rajaat, dating back to the Cleansing Wars. Their body bears a ring of life-shaped wood, but nothing else about the body is usable- the armour has long sinc rotted away, and only a few flakes of rust hint that they were once honoured enough to be buried with a metal weapon. C. Trap-filled gorge: A local wildlife trapper by the name of Breeg Orlivanch has littered this gorge with sharpened spikes made from bone and wooden poles tied together, as well as others hidden under the sand. D. Bokken's Hut: Bokken is a hermitic druid, one who would like to be left alone. So long as no-one is actively damaging his chosen lands, he suffers visitors, and might ask them to go and bring him Fangberries, so that he can craft better potion-fruits. He would like the Verdant Belt to become a safer place, and is happy to become a dependable source of potion-fruit in the region. E. Dead Trapper: Since faerie dragons aren't a thing in Athas, this gives a good opportunity to reinforce the world's deadliness. A nest of speckled Hurrum beetles (able to distract their prey with psionics) nearby the dead trapper might give PCs a hint of what caused Orlivanch to fall afoul of his own traps. F. Meenlock Nest: A pair of Meenlocks have a small nest high in a cactus grove here, replacing the faerie dragon Perlivash and the grig Tyg Titter-Tut. These are vicious predators that will steal from or harm the PCs a little at a time, and will attack or abduct a helpless PC if they ever have a chance, trying to drag them away to area O to transform them into more of their twisted kind. G. Cactus Grove: This grove of health cacti can be eaten for sustenance and absorbed water. A swarm of 3 Baazrags, stuffed to bursting with the moist flesh of the cacti, can be found here the first time the PCs arrive. While still dangerous, they're stuffed and have disadvantage on their attack rolls and saving throws. H. Centipede's Nest: This area, strewn with chewed and shattered bones, hiddes the lair of a gigantic centipede, about 20 feet long and able to lash out with incredible swiftness, carrying prey back into its deep hole. At the bottom is one of the Sun Lord's bandits, well-chewed but carrying a carved-bone emblem depicting his mask and with a scrawled map to the treasure buried in area M. I. Hot Springs: This area of sulfurous hot springs hosts a pair of warty-skinned giant frogs, with a psionic power to cause their victims to become incredibly thirsty. They prey on any creatures approaching the springs, hoping to drag them under the water and drown them. J. Temple of the Rock Drake: Surrounded by thorny growth for hundred of yards, the area is dominated by a boulder laboriously carved into the blunt likeness of a rock drake. Inside is a cleric of the elemental earth who desecrated the temple in times long ago, sacrificing the last of the elemental drakes and becoming a mutated elemental creature guarding this temple. If defeated, the pool of pure elemental dust can be used to treat wounds until the next sundown. Jhod Kavken might ask the PCs to clear the temple so that he can cleanse it and take up residence here. K. Bandit Camp: Detailed later. L. Gold Mine: This area can be used to set up a gold mine, which can be sent back to Tyr (or another city) to buy resources. Although gold is not a terribly useful metal on Athas, it is still valued for jewelery and decoration purposes, as well as forging magical items. M. Forgotten Cache: Here, one of the Sun Lord's bandits buried some treasure stolen from a Defiler they killed, before falling victim to the giant Centipede in area H. The treasure consists of a fine obsidian dagger, a bone ring (nice, but not magical), a wand of Burning Hands, and a spellbook with the rotted remains of several spells (which might allow a PC to learn the arts of arcane magic if they want to multiclass). N. Clear Pool: A small pool of pristine water seeps up from beneath the earth here, surrounded by lush vegetation. If the dangerous stranglevines are cleared away, the water can be drunk, and it is absolutely pure- those who drink it are fully refreshed, and gain inspiration, if they do not have it. However, the waters are muddied and consumed quickly, and so only about ten creatures can gain this benefit over the course of a month. After this, the water level has dropped down to below the ground, and the vegetation begins to wilt. Anyone Defiling this area will gain great benefit, but the spring will never flow again. It must be kept safe from desecration. O. Meenlock Lair: This area contains an old ruin in an area undermined by silt-flows and now fallen away. Here, a trio of Meenlocks have made their lair, and they transform any who fall into their grasp. P. Tuskgutter's Lair: Here, a vast Boneclaw Baazrag by the nickname of Old Tuskgutter makes its lair, isolated from others of its kind. The irritable beast attacks any creature that comes nearby, when it is not roaming the lands looking for a fight. Q. Rickety Bridge: The rickety bridge crosses a canyon thirty or more feet deep here, with near-sheer walls. Travelling out of the canyon requires travel of several miles in either direction, so the bridge is a valuable chokepoint. R. Gith Lair: This underground lair under a an ancient dead tress is infested by a tribe of Gith. This area is detailed in Section 4. S. Nettles' Crossing: Davik Nettles, once a ferryman who could convey travellers and bandits across the silt flats on his ferry, was murdered by the Sun Lord here and his hatred transformed him into a unique psionic undead creature. He can use his Levitate psionic power to float above the silt, and can be called by blowing one of the Inix horns at either end of the ferry-line. While maddened by hatred, he hungers for vengeance on the Sun Lord, and might be persuaded to spare and even assist the PCs in their journey. T. Dead Nightmare Beast: As a dead unicorn really doesn't fit Athas, I decided to go with something that can hint at the incredible power of Nyrissa, our 'campaign BBEG'. So a dead Nightmare Beast works well- it's spawned from new magic, something that didn't exist in the ancient times when Pyreen ruled the planet, and it's more evocative of how dangerous something must have been to overcome this creature the size of a Mekillot and clearly incredibly dangerous. However, that it's not rotting (in fact, having some grass growing from underneath its carcass might be weird enough to warrant investigation!), although one of its enormous tusks has been almost surgically sheared off should also draw some curiosity. This feels like enough of a clue to leave for later. U. Silt Crossing: This area has a known area of 'shallows' in the silt basins that criss-cross the Stolen Lands. However, these particular shallows are haunted by a pair of juvenile Silt Horrors- tentacled beasts that will attempt to drag down and suffocate any unwary adventurers. These are only small spawn, enough to bring down a human at their best. One of their previous prey was an adventurer and wanderer, whose pack contains a variety of gems and carved objects, as well as a valuable half-scale armour set and a map, tucked away in an old hollow bone tube, that can reveal some of the Stolen Land's secrets. V. Trapped Crodlu: A Crodlu has become trapped in a sinkhole here, and is exhausted and close to death from thirst. It will attack most creatures approaching, although the distance may allow a ranger or druid to befriend and free the poor animal. W. Fangberry Thicket: The thicket of Fangberries here are painful and difficult to harvest, but are also infested by several swarms of spiders, adding yet another hazard. The spiders are not harmed by the spines of the Fangberries due to their size, making them quite dangerous in this context. X. Silt Crossing: The silt basins come to a shallow area here, this one thankfully free of any Silt Horrors. Y. Halfling Village: This area is detailed in Part Five, but holds a small village of halflings who are at war with the Gith in Area R. They might be turned into allies (hopefully not slaves, unless you have some really nasty PCs). Z. Sun Lord's Fort: This area is detailed in Part Six. Tune back in next week for Part 3: The Bandit Camp! Also posted on Game Masters Stash on 11 September 2020. 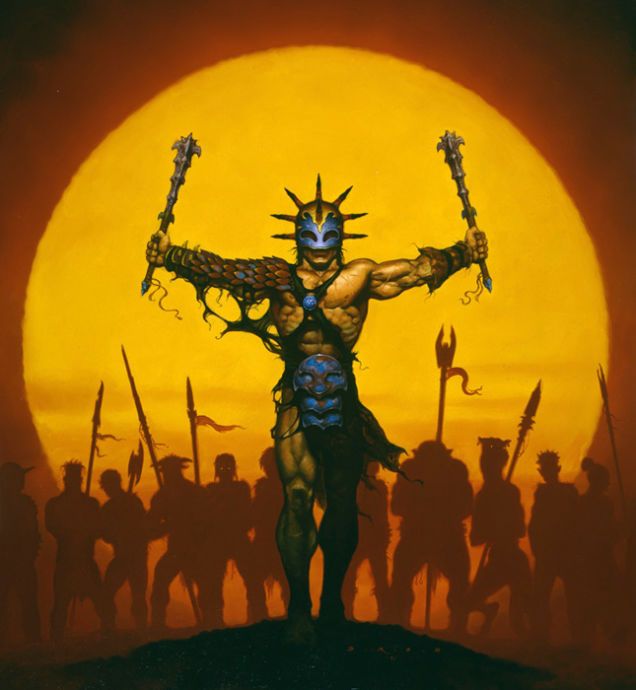 Art by Gerald Brom. A long-time friend of the page recently noted my Dark Sun-related posts and pointed me in the direction of Pathfinder's Kingmaker adventure path, which is based on the idea of the player characters venturing out into the Stolen Lands and founding their own kingdom. For this series of posts, I'll be working on posting an adaptation which I'm dubbing (for obvious reasons) Sorcerer-Kingmaker!
(I've not played Kingmaker before, and I'm muddling my way through for the first time, so feel free to let me know if I've missed something, or get something wrong.) The first adventure, Stolen Land, written by Tim Hitchcock, has an adventure summary that reads as follows: "The adventure begins with the PCs, each bearing a charter from the Lord Mayor of Restov granting license to explore and map the section of the Stolen Lands known as the Greenbelt, arriving at a small, remote trading post at the southern edge of rural Rostland. There, the PCs help defend the post from bandits before setting out to survey the wilderness. The rate at which the PCs explore the Greenbelt, and the paths they take, are up to them—many wonders and dangers await discovery, and as their explorations take them deeper into the Narlmarches and the Kamelands, the PCs begin to learn that the bandits in the region are far more organized than anyone thought—and find that they even have a leader, a mysterious figure called the “Stag Lord.” If allowed to continue building his army of bandits, the Stag Lord could well become a great danger to Rostland—that, and the reward on his head for his capture or death, should be all the new adventurers need to spur them onward." Overall Changes There's a lot here to work with, but the big changes will obviously have to be the setting- although a region on the south-western end of the Forest Ridge should be geographically distant enough and hard to reach that they're going to be pretty much on their own for a while. Since there are no stags in Dark Sun, replacing the bandit lord's identity will be necessary. Let's lean on the old Brom art used on the cover of Slave Tribes for nostalgic value, and call him the Sun Lord, with a mark depicting a radiant sun, and a pair of whistling maces. It's also probably important to note that while the adventure calls this area 'the Stolen Lands' and says it's inhabited by bandits, the colonial theme of '"retaking" land that once belonged to the nation doesn't work here, and the people living here are settlers themselves. This means that the PCs' mission is to seize and take settled lands, which, let's be honest, is a pretty garbage thing to do. They might be able to achieve this without full-on colonial invasion, and making the Sun Lord and his lieutenants a little tyrannical themselves can help to remove some of the power imbalance. It can also be useful to note Athas' resource scarcity, and Tyr's new status as a Free City means that its streets are becoming crowded with refugees and freed slaves, causing a great drain on the granaries and stored resources- options must be found, or people will be dying of hunger and thirst pretty soon! Having the PCs sent by the heroes responsible for Kalak's death, can tie them to the Free City, but perhaps King Tithian or some of the other factions are responsible for the other parties sent, meaning there's a common bond, but some rivalry. Part One: Oleg's Trading Post This part doesn't need much change- an isolated trading post with wooden (or similar) palisade walls, and beset by bandits, fits fine. You can mount the bandits on Kanks instead of horses with little difference, and have them hint at working for the Sun Lord. Happs is a desert-ranger turned bandit, and can even keep his longbow, focusing particularly on any Elf characters present. To be continued in Part Two. Also posted on Game Masters Stash on 4 September 2020. |
AuthorI'm Luke. He/him pronouns. Archives
May 2022
Categories
All
|
 RSS Feed
