Worldbuilding and Roleplaying Concepts
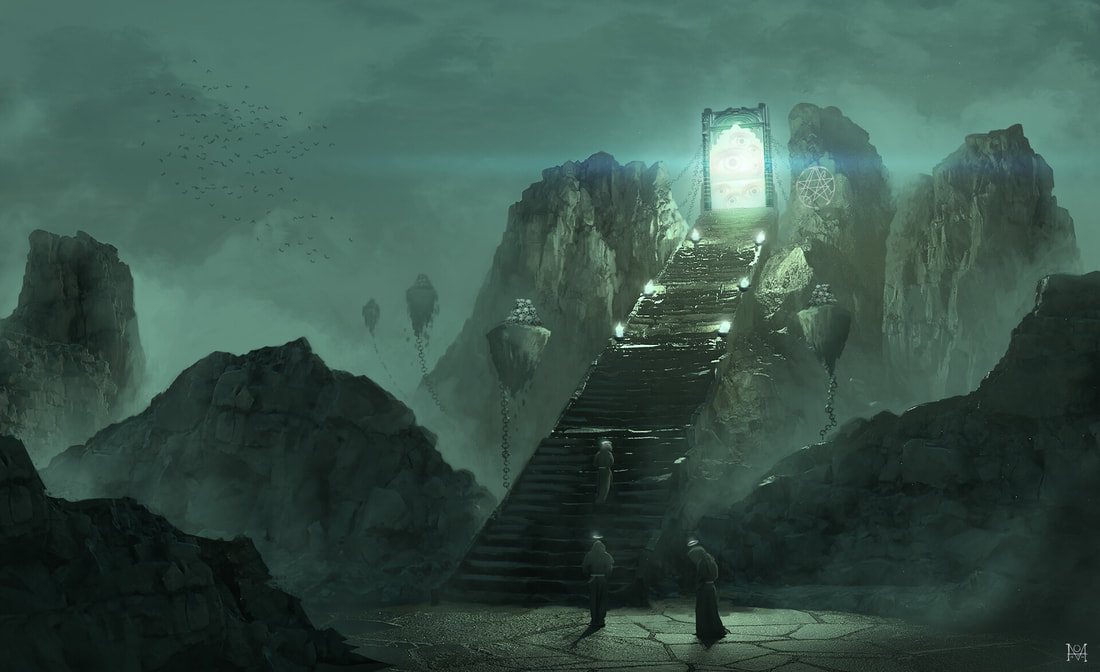 Art by Mert Genccinar, on ArtStation. In a remote, forsaken place of the world, it is said that there is a place where the borders of reality are thin, where a portal leading to another realm can be found, and that a secretive group of blasphemous monks guard it. If the correct offerings are brought to them, it is said that one can cross over into another world, one where reality's rules no longer apply, where one cannot be constrained any longer. This place, the site of the Forbidden Portal, leads to the alien shores of the Far Realm- and to the monsters that dwell in such a place.
How you can use the Forbidden Portal in your games: - The Forbidden Portal is such a place that might lead crusading souls to halt a villain breaching the veils of reality forever, journeying through and perhaps bringing back some being that does not belong. - Perhaps a player who serves one of the Great Old Ones may feel a pull to the Portal. This may be something that empowers them, or a betrayal which will steal their power. - Even those who do not serve the Great Old Ones might feel a need to consult the denizens of the profane monastery that watches over the portal. Their knowledge may be necessary for some quest, but dealing with their strange requests may push the friendship a little. Also posted on Game Masters Stash on 31 March 2021. 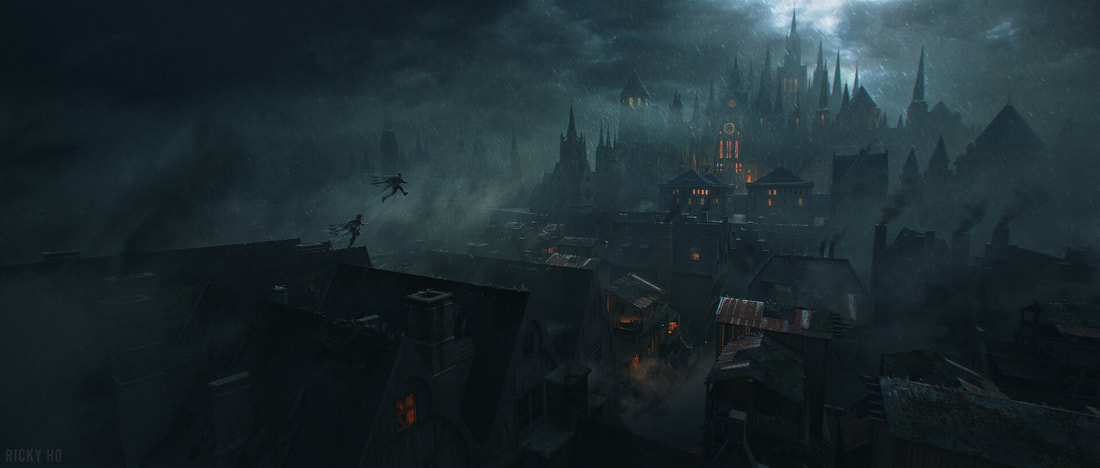 Art by Ricky Ho, on ArtStation. Varada is a city on the edge of the frontier- wealthy, burgeoning with those reaping the benefits of exploration, and poulated with those profiting from travel through it. It is a place of change and progress, as well as long-held privilege and archaic traditions. The wealthy of Varada have built upwards, expanding their homes into steeple-like needles of strata. It is a mark of one's own station that they can claim multiple storeys to their home, and 'looking down' on others has never been quite so literal.
This has led to a thriving trade in thievery, and conflicting guilds or gangs, often clashing on rooftops during the night. The people of Varada keep their windows shuttered and ignore loud noises at night, allowing the gangs to have their way. It is an expression nearby to have "Varadan blinders on", meaning 'to ignore things going on around you'. It is in this way that the people of Varada have entirely failed to notice the nest of Vampires making the city their home, passing of their victims as merely victims of thieves, cultists, or missing persons. Varada is a thrilling and dangerous place to live or inhabit, and could be transplanted easily into almost any campaign setting. Also posted on Game Masters Stash on 29 March 2021. 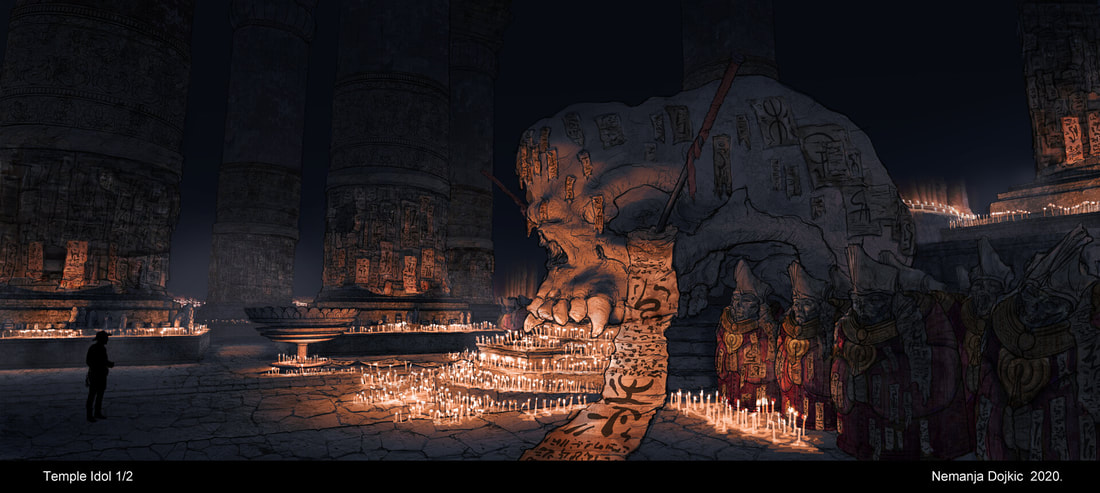 Art be Namanja Dojkic, on ArtStation. Inspired by the burtality, the might, the inherent rejection of order that titans represent, some deranged mortals build shrines to their magnificence. These mortals may recover pieces of their bodies, grind them up, eat their flesh to gain their power, and do whatever it takes to gain the might they think they deserve. These mortals often transform into monsters themselves, becoming warped by the primal energies of the beasts they serve.
This may be a way to explain all the 'wierd monsters' that exist in your world- if some kind of Tarrasque-like abominations are the end-state of such monsters, this can also assist with giving your villains a way to 'level up' into stronger forms as they continue to develop. Perhaps these effects start off small for mere cultists- twin irises within their eyes, flesh growths, or other concealable signs- but then grow as they ingest or absorb more of the Titan's energy. Also posted on Game Masters Stash on 27 March 2021. 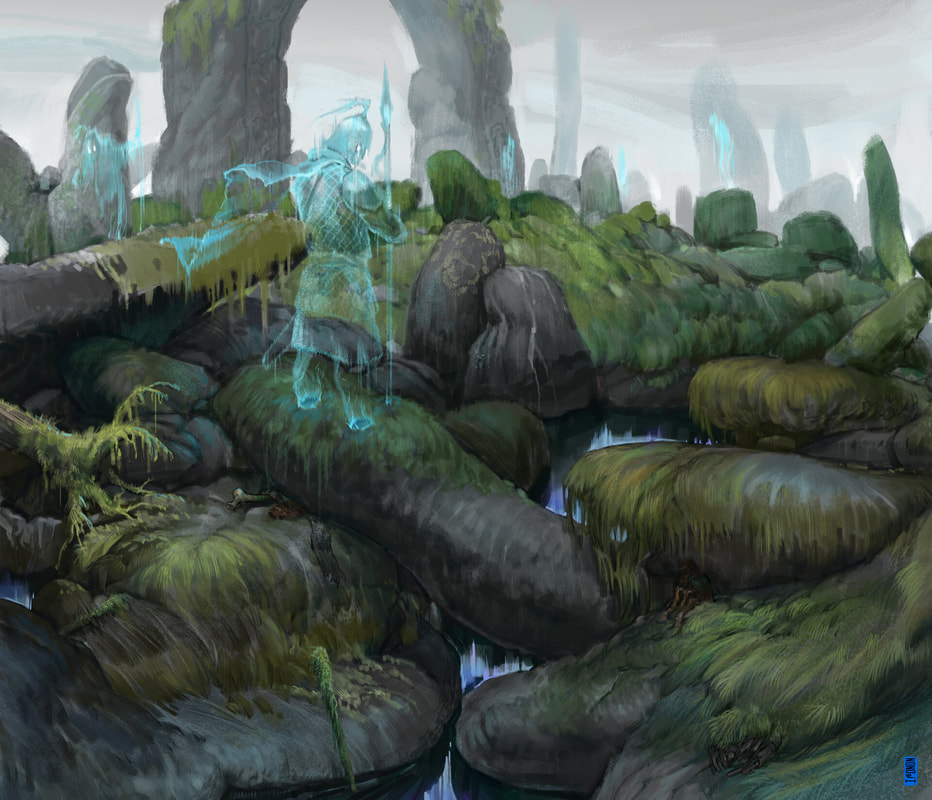 Art by Elena Churkina, on ArtStation. In times long past, a great danger threatened, and a brave band of heroes united to forestall its advance. At a time-honoured arch of rock, they made their stand, and there each of them fell in turn. History does not record the danger they faced, nor the results of their campaign. However, the heroes somehow remained, their spirits bound by the enduring oaths they swore to one another. They stand as silent sentinels, ghostly guardians warding the rock and one another against foes who have long since ceased.
How you can use the Final Watch in your games: - Some secret of the Final Watch might aid the players in a more modern quest - finding a lost artifact, the weakness of an ancient foe, the location of a forgotten place. Trying to commune with the spirits to learn the secret might awaken other foes, too. - If the ancient enemy that slew the heroes rises again, the rock arch is still a valuable tactical position, a place where a military advance can be stalled. Trying to defend its location against the same foes might stir the spirits to ultimately fulfil their oaths. This can be a crowning moment of glory for your players, standing among heroes whose names and deeds they know. - If the ancient war has ceased, the people who the heroes struggled against may have peacefully integrated into the local society. These spirits may not understand the amount of time that has passed, and their vengeance upon the unsuspecting descendants of their killers might be unpredictable. Perhaps these ghosts only arise on a full moon, or the anniversary of their deaths. Also posted on Game Masters Stash on 21 March 2021. 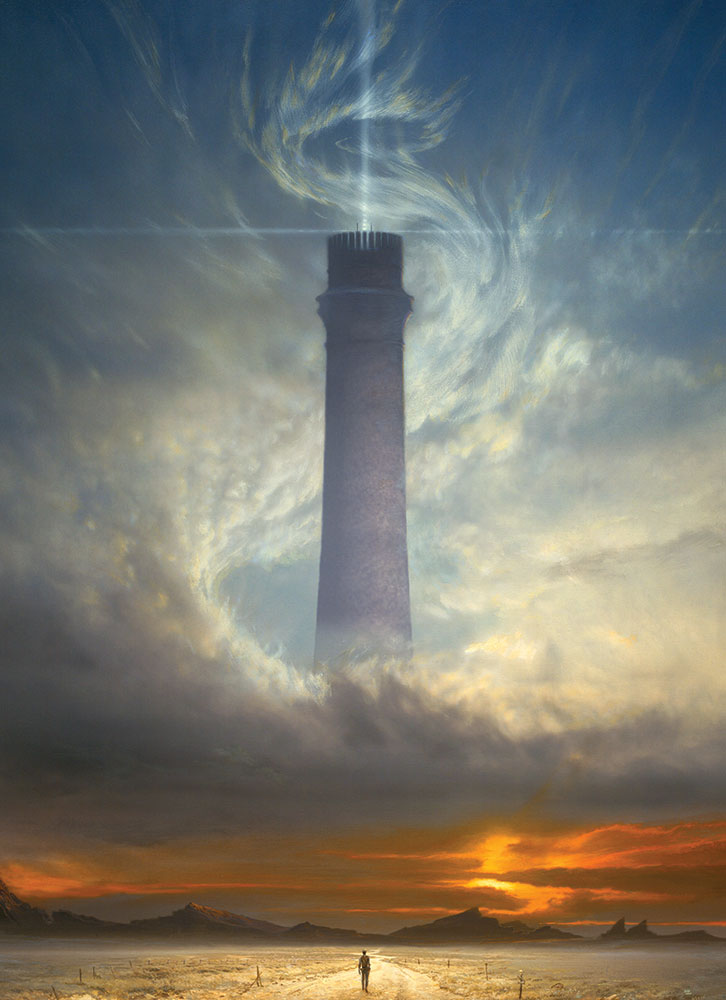 Art by Michael Whelan, on his own website. Part 3 of the Sorcerer-Kingmaker adventure path conversion, this chapter explores the tower at the heart of Nyrissa's prison in the First World, called the High Folly. This tower was part of the original sub-dimension built by Rajaat to exile Nyrissa, and keeps elements of the original Pyreen architecture. Here, Nyrissa's strongest allies and servants guard her from attacks. The ceilings are 40 feet high per level and vaulted, the angles oddly geometric and organic at the same time, with classical stylings. While there seem from the outside to be no windows, the interior is well-lit by elemental enchantments. (You can add incidental levels if you want mundane areas like sleeping rooms, kitchens, etc.- I've only detailed levels likely to hold enemies or places of special interest)
The original adventure features an outspread manor house, but in converting this adventure path, a single tower feel more thematically appropriate, and is easier to write. Level 1: Grand Atrium This floor's wide and ornate atrium has a height of 100 feet, ringed by torus-shaped balconies at forty and eighty feet above the floor, and encircling spiral staircases, which also lead further upwards. In the centre of the room is a vast mosaic forty feet wide, depicting an incredibly detailed Nyrissa emerging from a pearlescent shell (in the style of Botticelli's Venus). Within this level, a dozen elven Raaigs guard the entrance, kept from death by their supernatural enslavement by Nyrissa. These ancient and incorporeal elves use trained tactics an superior weaponry to defend the entrance to their mistress' tower. One appears at the door, formally denying entrance in a long-dead dialect of the elven language. They retreat instantly if attacked, or if intruders continue inside past the central mosaic. The Raaigs use life-shaped weapons which hurl venomous spines at great distance, attacking from the high balconies with the advantage of cover and their supernatural mobility. Level 2: Statue Display The floor has a large central feature of an ornate black sculpture formed of innumberable sharp curving angles intertwining. The sculpture separates into a pair of Obsidian Retrievers (from Mordenkainen's Tome of Foes) forged by Nyrissa and asigned to ward the area against intruders. They are merciless hunters with enslaved elemental spirits, made to slay her enemies. Level 3: Colonnade This floor is ringed with ornate pillars, and a series of psionically animated mosaics on the wall laboriously detail the history of Nyrissa's opposition to Rajaat's plan, his betrayal and imprisonment of her, and then the PCs' defeat of her plans, ending with the figures denoting the PCs reading a circular series of mosaics and then looking backwards over their shoulders towards themselves. The mosaics set up off a psionic trap causing observers to make a Charisma save (DC 18), taking 28 (8d6) psychic damage on a failed save, or half damage on a successful saving throw. Level 4: Shadow Grove This floor is decorated with wall-mosaics of gorgeous white trees against a blue sky. If investigated closely, there are shadowy figures peering from behind the trees and observing any intruders. These figures are former apprentices of Rajaat, and have been spying on Nyrissa's activities for centuries, hidden within the mosaic from her perception. These three Kaisharga have defiling and psionic powers, and have observed Nyrissa's distress. Although they do not wish her plans to succeed, they feel more threatened by the PCs' success against her, and while one attracts their attention, the other two launch a surprise attack from other sides of the room. Level 5: Dancing Trophies This floor features dozens of tall glass domes enclosing Athasian animals which Nyrissa brought back from her periodic visits, slaying them and then animating them with her powers. They have a wide range of bizarre and strange creatures, from gold scorpions, kanks, and even a small Silt Horror. Each moves and scuttles, permanently animated. At the centre of the room is her prize, a perfectly-preserved Gaj which hovers in place, its eyes refocusing and its feathery antennae waving. It moves to attack if anyone gets too close, as a large-sized Animated Object. If destroyed, it causes a colossal explosion of force which shatters the glass domes in the rest of the room in a cascading wave. Anyone in the room is required to make a Dexterity saving throw (DC 22), taking 63 (18d6) slashing damage on a failed saving throw, or half damage on a successful save. Level 6: Gallery of Champions On this level of the tower, Nyrissa has made sculptures of living wood, representing many of her past mortal champions on Athas. The PCs may recognize Eirikk and Castor Irovetus among their number, but they go back for thousands of years, representing many different cultures and beings. Level 7: Well of Blinding Purity This level contains a capped well which descends below the surface of the floor to a depth of 10 feet. It contains a portal leading to the Elemental Plane of Water. However, Nyrissa's enchantments have poisoned the water with blinding sickness, affecting any of the mortal races who drink from it (Constitution save DC 18). Level 8: Salon of Confusing Sounds This level of the tower is sumptuously decorated with vivid frescoes of primeval forests filled with incredible blooms and humanoids of incredible beauty. The sounds of distant celebration can be heard, echoing from place to place. Mortal creatures within the tower level are supernaturally distracted (Wisdom save DC 15). On a successful saving throw, creatures are unaffected and can carry out activities as desired. On a failed saving throw, a creature becomes completely obsessed with finding the source of the sound, and takes 3d6 psychic damage if someone interrupts them. Level 9: Level of Weeping Daemons An empty pool dominates the centre of this level of the tower, made of twisted and chaotically-shaped monsters, each sobbing in terror. Inspecting the faces in great detail (Investigation or Perception DC 25) finds one face which is smiling, and pressing in this face causes each of the other faces to weep tears of blood-red sap for one minute. These can be gathered and ingested, with a total of 10 d8s of healing for the entire minute. The device resets after 24 hours. Level 10: Sights of the Blue Age This level appears to have three vast windows, twenty feet high and fifty feet wide, looking out on vistas of the Blue Age. The 'windows' are psionic enchantments which depict idealized pastoral scenes, even more fantastically alien than the First World outside. Joyful halflings skip and work among life-shaped buildings; trackless seas crash and roll; water falls bountifully from the sky onto lush green vegetation. Each window is accompanied by a soundscape and psionically-stimulated sensations that mimic the surrounds: fat raindrops trickling through hair; vegetation coiling gently around limbs; soft silt giving way underfoot; children laughing and whispering. This will likely be terrifying and instantly put any Athasian on edge. Nyrissa walks this room to relax, and the sensations are entirely harmless. Level 11: Nyrissa's Throne Room This level is rarely used, and is now hung with opaque curtains. Nyrissa's throne room is walled with living wood, gone slightly to rot. Behind the tall and elegant wooden structure slinks one of Nyrissa's lieutenants, the Wriggly Man - another of Nyrissa's Pyreen allies and the one responsible for her life-shaped creations. The Wriggly Man has life-shaped himself beyond the point of his own mortal being, and now consists only of various life-shaped creatures which stick together in a hideous approximation of mortality (a Star Spawn Larva Mage). He slithers towards the party hands wide, and offers his aid- he believes that Nyrissa's intent has grown too grand, and wishes to stop her. All he asks is to be allowed to rule the First World when Nyrissa's threat is ended. He is, however, lying - he predictably attacks at the first opportunity. Level 12: Great Hall This hall is Nyrissa's favoured gathering-place for her servants. Its wooden panels are inlaid with mother-of-pearl panels sheets over five feet wide, and incredibly valuable. Living vines adorned with sweet-smelling flowers twine around each of the columns and the staircases. The hall is guarded by another dozen of Nyrissa' elven Raiigs. They hold defensive positions and defend their mistress determinedly against assault. Level 13: Nyrissa's Redoubt This rooftop is ringed with a colonnade looking out over the First World, over a thousand feet from the ground. Here, under the bizarre blue sun of the First World, the desperate Pyreen princess holds her final ground against those who would see her dead. ...Coming next week, of course! Also poste on Game Masters Stash on 19 March 2021. 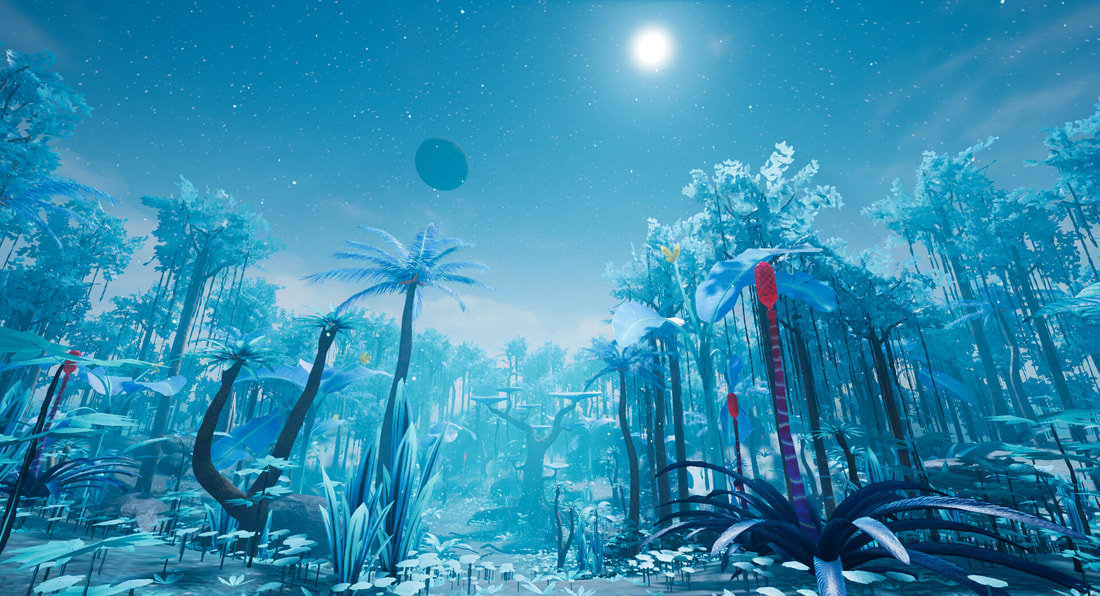 Art by Alain Prélaz, on ArtStation. This chapter of the final book of the Sorcerer-Kingmaker adventure path conversion takes your PCs into the First World, the faery-dimension in which Nyrissa has been imprisoned for millennia. It is a place of wondrous and growth, a sky of perfect cerulean blue, and the most pure air which any of them have ever breathed, filling them with elation and joy. It is also a place of treacherous druidic magic and psionic enchantment.
Using the trophies from Nyrissa's blooms allow the PCs to travel from the rooftop of the Tower of Thorns, deep within Thousandbreaths, into the prison dimension of the First World. The portal opens silently, like a curtain being drawn aside in a ring around them, revealing the breathtaking azure skies. Breathing the air brings a feeling of life and joy. The soil underfoot is warm and moist. The water shimmers like diamond and tastes purer than any water they've ever tasted. Even fire burns clear and hot in the oxygen-enhanced environment. However, breathing the volatile atmosphere for too long overwhelms mortal systems, leaving any of the First Races (dwarves, elves, halflings or humans, and any races who are descended from them) taking 1 level of Exhaustion. Within the thick jungle can be heard constant disembodied voices constantly calling, whispering, and crying out. Anyone sleeping within The First World are subjected to the True Dreams of the Nightmare Rook, and have disadvantage on saving throws against its effects, if it still lives. Exploring the thick and alien landscape might take multiple trips, for the First World is a vast place with many fantastical locations. Each of the trophies gained from Nyrissa's blooms is linked to a Glade within the First World, and while carrying this trophy, a creature immediately gains Inspiration on entering the linked Glade, and regains it at the start of each of their turns. List of Locations A. The Tower of Thorns. The Tower of Thorns exists in both dimensions, and stands empty unless it has been inhabited since dealing with Irovetus. When Briar is brought here the first time, it sends out a pulse of energy, and sprouts tiny quick-growing leaves along its shaft, but leaving the point clean. Its enchantment increases, and any critical hit with the weapon inflicts an additional 14 piercing damage. B. Glade of the Whirling Shore. This glade contains a vast lake of dark water ringed by enormous hills of thick vegetation, with black-scaled fish easily the size of a Kank swimming beneath the lake's surface. If hunted, these are harmless and surprisingly tasty, with very moist flesh. However, the true threat is the four gigantic Shambling Mounds which lurch to life and try to draw foes in to engulf them. If the elementals of the Whirling Lake bloom have not been dealt with, they are also present here. Linked trophy: The quartz fish. C. Glade of the World Tree. This glade rings a gigantic tree dwarfing that of the Fourth Bloom- stretching farther than the eye can possibly see upwards, and seemingly a mile or more in diameter.. Within the cavernous twists of the tree's roots can be found a winding passage leading inwards to the heart of the tree. Its flesh is warm and damp. In the heart of the tree can be found a chasmlike chamber, oozing dark sap, and a sliver of the tree is missing. The amber-coloured sap functions as a series of huge Black Puddings, their acid dissolving stone and metal but leaving wood fibres untouched. If Briar is touched to the space of the missing sliver, it visibly strengthens, increasing its enchantment to +3. If the treants protecting the Tree of Death bloom have not been dealt with, they also appear here as saplings springing from the flesh of the colossal tree itself. Linked trophy: Heartwood from the Death Tree. D. Glade of the Nightmare Spire. A mile-wide glade surrounds a tower of glossy black obsidian, upon which stretches the terrifying Nightmare Rook. A starry expanse can be glimpsed through the utter darkness of its wings, and it easily spies any who approach it. If any creature approaches within one hundred feet of the tower, it swoops and attacks. The Nightmare Rook is a Roc of double normal size and hit points, with tremendous psionic power and the ability to use the Id Insinuation psionic attack as a legendary action. If the Nights of Dread bloom has not been dealt with, the Nightmare Rook is also blinking constantly. Linked trophy: The Nightmare Rook's feather. E. Glade of the Fruiting Orchard. A wall of simple mud bricks, thirty feet high, protects a glad of luscious plants with giant, sweet-smellin pods hanging from their branches. These pods each hold a human-sized Mandragora blight, and there are likely thousands growing here. If any are slain, they assemble and grow together into a vast and gigantic Mandragoric Titan, sixty feet tall. They wail constantly, threatening swift death on any who can hear them. If the Mandragora swarms of the second bloom have not been dealt with, some of these are present as well, attacking underfoot and joining themselves to the Titan to heal its damage. Linked trophy: The dead Mandragora. F. The Glade of the Shunned Falls. This glade was formed as part of the original prison dimension, and is guarded by a floating and withered head- a defiling Demilich named Arishat, once Rajaat's apprentice and a failed Champion. Although wicked, Arishat hungers for knowledge and is willing to converse and perhaps offer a brief respite. He might, however, be tempted to attempt to energy drain a sleeping target who he thinks may not be missed. This glade does not generate a bloom, and has no linked trophy. G. Glade of the Mire. This glade opens onto a watery swamp perhaps a mile across. The mud swarms with handfuls of violet-coloured worms of normal size, as well as a further trio of Purple Worms which burrow and pounce on any living creature approaching. If the Rise of the Mireworms bloom was not dealt with, there are an additional trio of purple worms here, although only about three will be above-ground during any round. Linked trophy: Knotted handful of violet worms. H. Glade of the Knurly Palace. This glade surrounds a tumbled and run-down palace of marble in ancient styling, overgrown with gigantic brambles. Although there are easily a dozen more Yellow Musk Giant Zombies wandering the ruins and idly tending the Yellow Musk Creeper pods, they do not immediately attack, and generally ignore intruders. An odd musical humming can be heard deeper within the ruin, though- the Knurly Witch, once a Pyreen who served as Nyrissa's friend and confidante, but has become warped and joined with the Yellow Musk itself. She has become one with the spores themselves, and although some traces of her mind remain and she can give a little information about Nyrissa, she will eventually turn on them and bring down all of the zombies upon them at once. If the Knurly Briars bloom has not been defeated, there are an additional dozen zombies present. Linked trophy: Yellow musk creeper pod. I. Expanse of the Hatori. This glade borders a trackless desert that reaches the horizon. This was the home of the Great Hatori. The sand churns with activity as a trio of 'lesser' Hatori, each fifty feet long themselves, approach across the desert. The brood of the Great Hatori hunger for the flesh of mortal creatures, and launch at anyone approaching. If the Great Hatori was not defeated, it joins in the second round, erupting from the sand and shouldering its brood aside. Linked trophy: Eye of the Great Hatori. J. Glade of the High Folly. A great glade surrounds the shining white tower in which Nyrissa lives, built with alien architecture and ringed by a moat several hundred feet wide, filled with deep, dark water. Around the tower wheels the tremendous form of a Water Drake, Ilthuliak, flying with its psionic power to watch the nearby area. If The War of the High Folly has not yet taken place or been defeated, the glade is filled with Nyrissa's army, making it nearly impassable. The tower gardens filled with tumbled-down white stone ruins, overgrown with partly-tended gardens, and lead to a causeway dropping away into dark water below. The drake Ilthuliak holds vast hatred for humanoid races, and gives no quarter to intruders, attacking as people cross the causeway towards the tower. The archway is lined by a pair of double-life-size statues of Nyrissa, one holding a spear that is the twin to Briar, the other holding an elegantly-wrought staff. The doors open at the touch of any sentient creature. Linked trophy: Obsidian sand. Return next week for exploration of Nyrissa's tower! Also posted on Game Masters Stash on 5 March 2021. 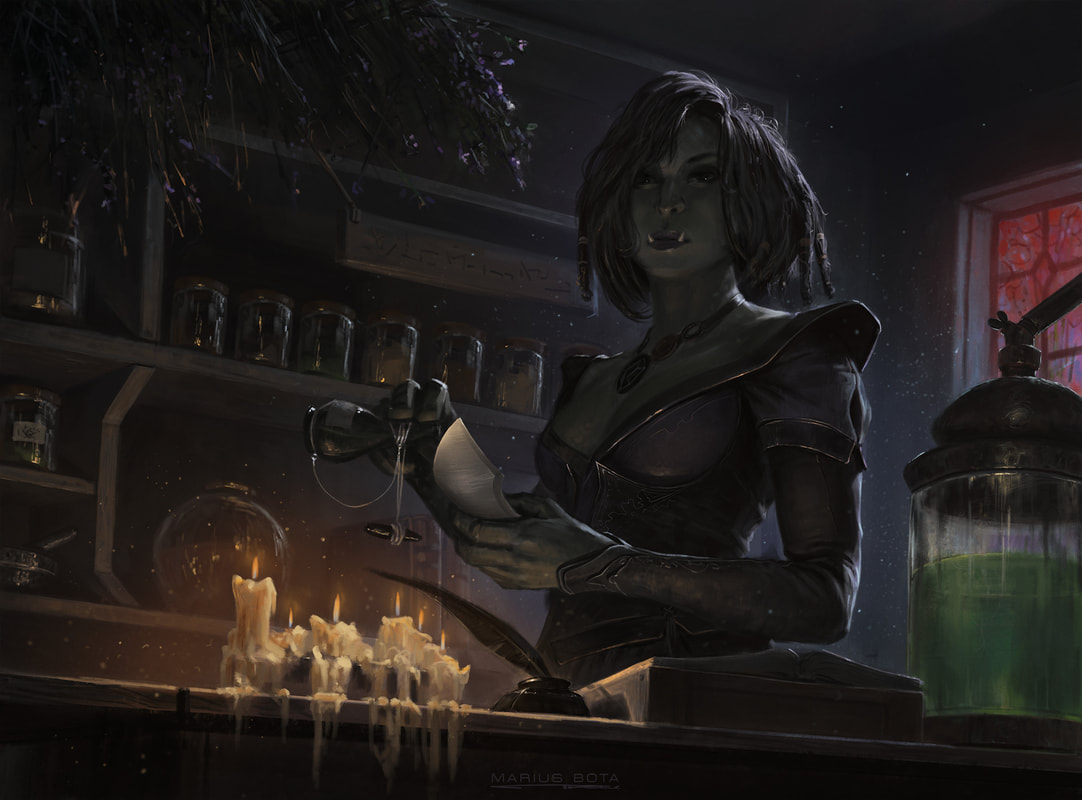 Art by Marius Bota, on ArtStation. Jhayeta's Alchemies Shop is a creaky and dim old place run by Jhayeta, a half-orc master alchemist who brooks no nonsense. She prefers the dim lighting, and objects if anyone tries to lighten either the mood or the light level. She brews extremely fine goods, but cares little for finicky details like 'taste' or 'smell'. After all, her kind can eat rotting carcasses from a garbage bin for all that humans care, so why should she compromise her product by catering for extra details which only dilute the effect?
Jhayeta's alchemical and magical potions often have extra effects, but sometimes they can be a little... surprising. Any time you drink one of them, roll 1d10: Roll --- Result 1 - Potion acts as intended, lasts for 10% longer duration. 2 - Potion tastes like rotting fish carcasses after the seagulls have finished with it. Make a Constitution saving throw (DC 12) or be Poisoned for the next 1d3 rounds. 3 - Potion has an enormous amount of sugar. You gain advantage on Initiative rolls for the next 1 hour, and then take 1 level of exhaustion. 4 - Potion restores your arcane energy. You regain 1 expended spell slot of 1st or 2nd level. 5 - The potion is exceptionally strong, and you only need to take half the dose. Don't remove it from your sheet, and the next time you drink it, there is no additional effect. 6 - Potion makes your mouth dry out uncontrollably. You need to drink a gallon of water in the next hour, or you take 1 level of exhaustion. 7 - Potion causes uncontrollable (loud and smelly) flatulence for the next hour. Anyone trying to detect you with smell or hearing has advantage on their rolls. If anyone is around you, you are shamed unless you can blame a nearby dog. 8 - Potion has healing effects. You regain 8 (1d8+3) hit points. 9 - Potion focuses your mind. You gain +2 on saving throws against effects which make you Charmed or Frightened for the next 1 hour. 10 - Potion makes you full of energy. You have advantage on Athletics and Acrobatics checks for the next 1 hour. Also posted on Game Masters Stash on 4 March 2021.  Art by Goeun Kim, on ArtStation. Part 2 of Book 3 of the ongoing Dark Sun conversion of Pathfinder's Kingmaker Adventure Path deals with the disappeared district of Dusthold, emptied of its inhabitants by the beast-headed giant, Vordakai.
The town was founded by Maegar Varn, third son of one of Balic's Patricians, at about the same time as the PCs arrived in the Verdant Belt. Dusthold is a plain little town with not much to show for its hundred or so inhabitants, but is peaceful and organized enough. The PCs' settlement may have had a contact or two with Dusthold's agents coming to explore the area and trade, but are unliely to have ventured out to find the town themselves. The town's trouble began perhaps a year ago, when a treasure-hunter named Uriusyne Ganus, another native of Balic, reached Dusthold. He possessed an ancient map claiming to lead to a long-forgotten crypt in the mountains southwest of the new colony. Yet, when he finally located the tomb, he gained naught but a single jade bracelet before awakening an ancient evil. Eager to cover up his foolish brush with death, Ganus adjusted his story and claimed he had found the jade bracelet abandoned in an desert grove while scouting the Tors. Lord Varn, being something of an amateur historian, took a great interest in the jade bracelet, and sent for one of Balic's philosopher-scholars (and a secret member of the Veiled Alliance), a man named Ervil Pendrod. This sage was able to recognize the bracelet by its description and the drawing sent as being a relic of the long-forsaken Wemic culture, thought to have been annihilated by the Sorcerer-King Tectuktitlay during the Cleansing Wars. However, he was not the only one to show an interest. In times long past, the beast-headed giants of the Tors of Levenies ruled this land unopposed, headed by the terrifyingly powerful Vordakai, whose psionic might threatened even a Sorcerer-King. He was trapped eventually by one of his own apprentices who lured him into a psionic torpor, and imprisoned him in a complex that Vordakai had built to help focus his mind. For thousands of years, his mind has wandered the planes, unattached to his physical body. However, the theft of the jade bracelet awakened him and returned the antediluvian psionic lich to his crumbling body, his powers significantly weakened by the vast stretches of time since he lived. Following his awakening, he armed many of the psionic enchantments guarding his complex, and then set out to learn about the changes to the world. Following his senses to the town of Dusthold, he unleashed ancient psionic power and emptied the settlement of its inabitants in a single night of horror, trapping them in obsidian orbs holding their soul energy. Now, Vordakai studies the lore he has learned from Dusthold's disappearance and draws up his plans to establish a new empire. The empty village has, in the meantime, been taken over by the Culchek tribe of Hej-Kin, and wil be dangerous for explorers to venture into. A flock of Kes-trekel can be seen over the town, circling the 1. The Kank Farm: The Kank farm here on the outskirts of Dusthold has been overrun by a dire Crodlu which has slaughtered all of the Kanks and made itself a nest within the farmhouse. It viciously lashes out at anyone approaching, guarding its valuable clutch of eggs. 4. The Selenford: A horrid Chuul dwells in the muddy oasis here, and has attacked several of the Hej-Kin which have approached already. 8. Outfitters: The long, low building in the middle of town has several slaughtered livestock, picked at by a vast flock of Kes'trekels. If disturbed, the hundreds of carrion-eaters rise in several swarms and descend on the unlucky explorers. 12. The Siltbeast: The town's inn has a 'door' of lizard scales threaded on string, half torn down. The inn's sign, on a ceramic shingle, hangs uneasily, and on the wall is carved a single word- "NOMEN". This is the last sign left by Ervil Pendrod before his mind failed to Vordakai's will. Inside can be found a single Hej-Kin that stands, silent and perfectly still, facing a paper-strewn desk in one corner of the common room, one hand clutching a book. This unlucky creature stumbled upon Pendrod's trapped spellbook which bore a Glyph of Warding, which slew it instantly. Among the scrolls and clay tablets which Pendrod had among his possessions can be found some writings about the Nomen wemics and some very slight details about the beast-headed giants who once lived in the area, and the name 'Vordakai'. 13. Sacred Spring: The sanctified spring has been thoroughly looted, and the waters muddied and befouled by the Hej-Kin. In a cask weighted with rocks and sealed with pitch can be found several recently-written parchment spell scrolls. 15. Grange: Since the disappearance, the beetles which have long plagued the town's grain storage have reached crisis level. Fiercely territorial and aggressive, the beetles swarm to attack anything they perceive as trespassing, pursuing foes outside the grange for 1d4 rounds before they return to continue their feeding. At this stage, the town's grain is hopelessly befouled without magical intervention. 18-37: Dusthold Stockade: The stockade and manor-house of Maegar Varn have been siezed by almost two dozen Hej-Kin of the Culchek tribe, including their skilled hunters and some skilled with clerical earthen magic. They are clearly uncomfortable making their home above the ground, but have found the lure of ready water and food just too good to resist. The Hej-Kin have a pack of four leashed Jhakar which they will loose on foes if threatened. Their chieftain Agai is a mighty cleric of the Earth, and has powerful magic which he will use to defend his tribe. Within the stockade can be found several magical items, including Agai's Bag of Holding, a magical ring matching the one on Vordakai's hand itself, and Skybolt- a beautifully-crafted longbow of incredibly heavy pull, inlaid with ivory panels. This was stolen from the Nomen wemics by the Hej-Kin many months ago, and they will recognize it and welcome its return. In Maegar Varn's quarters can be found a mosaic map built into the wall, detailing the area within around twenty to thirty miles of town, including the location of the Wemics' hunting grounds. From here, the clues point the PCs in search of the missing townsfolk towards the pridelands of the Nomen wemics, a race thought extinct. Coming soon in part 3! Also posted on Game Masters Stash on 13 November 2020. 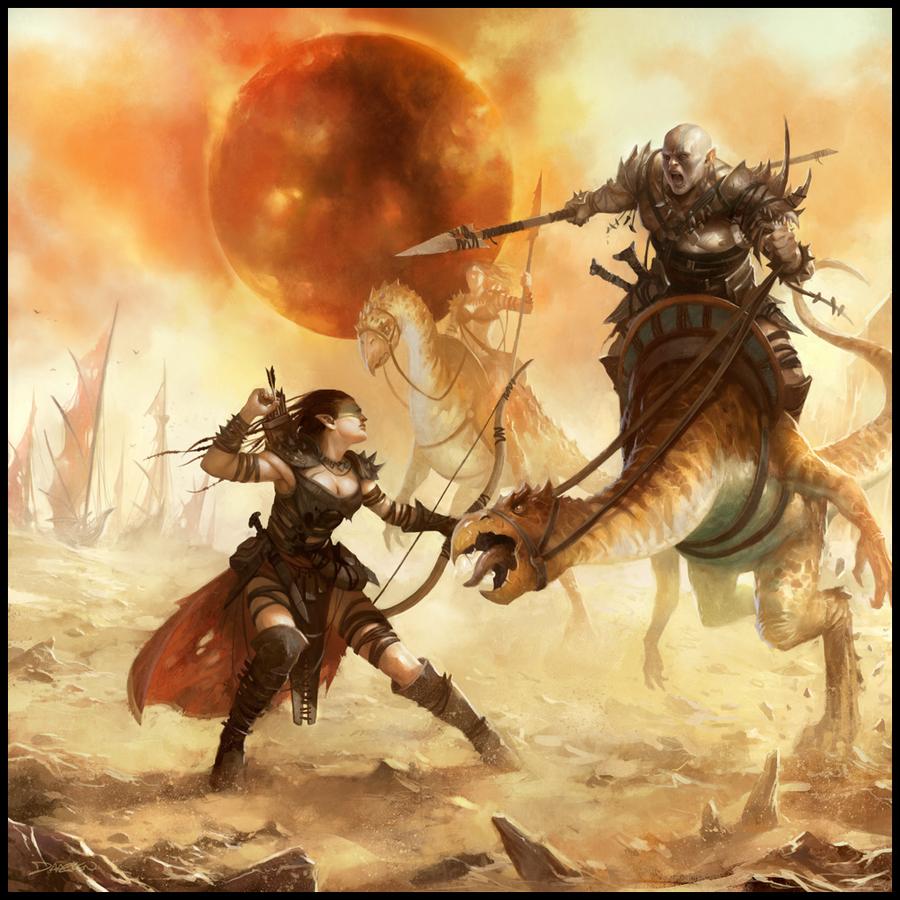 Art by Mike 'daarken' Lim on DeviantArt. Part 2 of Sands Stained Red, my ongoing adaptation of Pathfinder's Kingmaker adventure path series, deals with the 'meat' of this adventure, and some wider areas to explore. Even if you're not using this as part of the adventure path, some of these could be useful as isolated encounters or locations for your Dark Sun game.
This part deals with the PCs having a larger area to explore, and establishing much more of a presence in the Verdant Belt. The challenges will vary in difficulty, so PCs will have to be cautious and not simply blunder into everything they can see. A: The Grove of Tiressia This forested glade, with a small dwelling built by the pond, is the home of a peaceful half-elf Druid and her lover, a wounded Mul warrior by the name of Falchos. Unlike Bokken, Tiressia is much more cautious about having her peace disturbed, but could do with a hand, and explains that the dangerous Scythe Tree is trying to kill them. She is willing to pay them in some enchanted items, and/or helping to inform the PCs about what's going on in the Narlmarches, which can help with their new settlement's Stability score. B: A Delicate Situation The PCs encounter a logging party being held at bay by an aged Thri-Kreen, its eyes milky and its carapace faded. The loggers, led by a Dwarf named Korak, insist that the strangely-bobbing Thri-Kreen came out of nowhere, caught arrows fired at it, and attacked them, and is getting in the way of important business. The Thri-Kreen, a monk named Ch'k'klak, insists as well as it can that the loggers should leave the area, and should value the trees they fell.This gives the PCs a moral quandary to overcome, and a choice between individual importance and the progress of civilization. C: The Narthropple Expedition Since Gnomes aren't a part of Athas, and their whimsical tone doesn't fit well at all, these can be enother expeditionary party, in grave danger and need of urgent rescue if the PCs want to make an ally. The road has caved and fallen down into the silt below, and the howdah containing the expeditioneers and their belongings is sinking swiftly, as the distressed Mekillot is thrashing hard. Jubilost, the expedition's leader, was thrown free, and waves or calls out if he can see people approaching. However, the thrashing is causing attention from a large Silt Horror, which can be seen approaching. If the PCs assist, they'll be endangering themselves, and potentially taking on extra mouths without any of their supplies or belongings. D: Sun Lord's Fort The PCs will have visited here in the first adventure, Stolen Land. The ruined fort makes an ideal place to base their new settlement. E: On the Prowl The Kamelands are full of predators and hungry beasts. A pack of three Dune Reapers are one such threat, consuming their way across the land. F: Lonely Barrow (detailed in Part 3) G: Abandoned Keep (detailed in Part 4) H: The Blighted Hollow This area reeks of defiling magic, and contains a horrid magical plant called the Scythe Tree. It is able to absorb magical energy from the nearby area in a similar manner to defiling. Among its roots can be found scattered bones and remains. I: The Mad Hermit Bokken's younger brother is a manic and dangerous wild man, given to tormenting people he comes across, with his 'pet', a Dagorran he has imprinted upon. He prefers to attack with surprise, but if others run across him, he pretends to be an old, lonely hermit Druid, and makes vague promises of helping them. J: The Waste Witch In the silt flats there is a small house, inhabited by an aged Psion. She has a bad reputation, but mostly just wants to be left alone. She is extremely knowledgeable about the area of the Kamelands, and can warn them... if they respect her privacy. Otherwise, a spindly crystal golem which she has painstakingly built over the last few decades can protect her. K: Old Crackjaw's Den A great and ornery Silt Horror dwells in the silty cave here, angry at its long imprisonment after the silt shallows marooned it in this area. L: Gurdin Silt Ford Normally quite deep along the majority of its length, the silt becomes quite shallow here, creating a navigable ford across its width. M: Chathrang Den In a grove of bamboo littered with splintered sticks and crushed bones dwells a Chathrang. The dangerous beast attacks any who approach, harpooning them and dragging them back to its lair to be eaten. N: Lair of the Lizard King (detailed in part 5) O: Candlemere Tower This ancient ruin on an island in the middle of a wide lake of water, built during the Champions' War, is overrun with viscious nettles that cause paralysis, as well as dozens of Will'o'Wisps - psionic remnants of the folk who dwelled here. If cleared, the keep can be established as a dwelling-place, although it may draw attention. P: The Mud Bowl This strange, 20-foot wide bubbling caldera of mud is heated by geothermal activity, and large mounds of fungus and mushrooms grow here, which can be used to feed a large group if necessary. However, a Tendriculos, a dangerous fungus-beast, will attack any who lurk nearby. The Wastewitch would like some of these mushrooms, if they can be provided. Q: A Cry for Help A harem of the cruel beasts known as Sand Brides lurk in this area, using powers of illusion to lure travellers with cries for help and staged attacks before turning on them to crush them to death with their sandy limbs. Among their treasure is a breastplate made of blue drakehide, a very fetching and eye-catching piece. R: Hargulka's Stronghold (detailed in part 6) S: Master of the Forest A lone So-Ut rampages its way through the canyons here, picking apart pils of stones and hurling them against one another. It is a violent, unstoppable beast that is best avoided. T: The Wandering Giant A lone beast-headed giant named Munguk is looking for blueberries to ferment and eat, game to hunt, and a mate, preferably in that order. While he is dangerous, the giant with the head of a great black-eyed shark is confused and cranky, and if he is offered friendship (and preferably some alcohol), he may share some advice about the area before meandering off to the East on his own. U: Abandoned Ferry Station Half-collapsed, rotting wooden buildings stand on each bank of the silt flats here. The buildings have previously been used as hideouts for halfings, Gith, and bandits, changing hands many times. They can be cleaned and reinhabited, making a good place to settle. V: Braxat Lair (detailed in part 7) Also posted on Game Masters Stash on 16 October 2020. 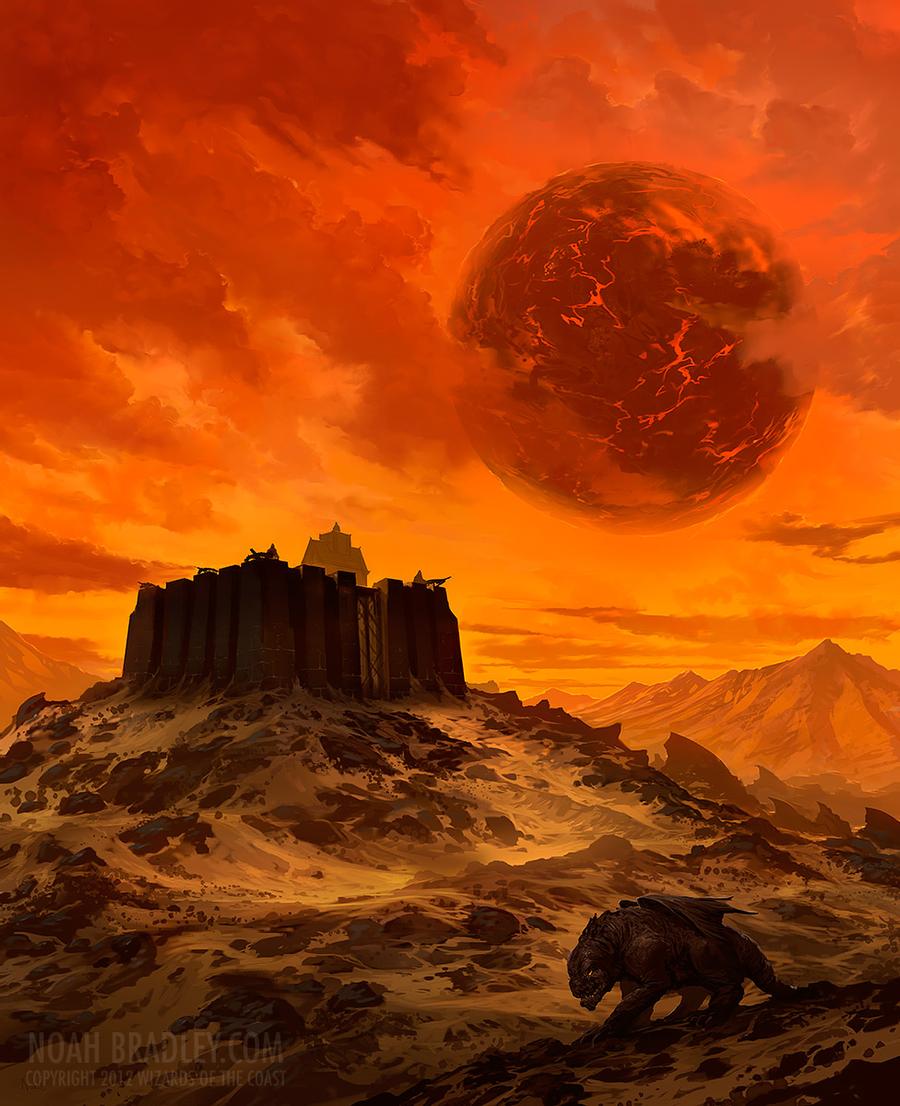 Art by Noah Bradley, on DeviantArt. Part Two of converting the Pathfinder: Kingmaker adventure path to Dark Sun for 5th edition D&D. As always, let me know if I've goofed, or if you there's something specific you want to see!
In my last post, I left off at the end of Part One of Stolen Land, with the PCs having just dealt with a small grou of bandits. From here, the options open up, and the PCs have a larger area of the Stolen Lands opened up to explore, this area being the Verdant Belt (I can't resist the callback to Troy Denning's The Verdant Passage, and it fits "the Greenbelt" just so perfectly). I think it's best if we assume that the Verdant Belt is an area with some scrubby vegetation, and a few trees- not the full-on rainforest of the Forest Ridge, but still a fertile place that's quite desirable to settle in. If there are settlers following the PCs by a few days or weeks, this gives them a good place to have other members of their 'character tree' - replacement or alternate characters who can substitute in if one of them is killed, or ends up not being what makes someone happy to play. I'll go location-by-location: A. Oleg's Trading Post: We briefly touched on this in the last post- it's a smallish trading post, probably a one or two-storey adobe building with some light walls and stable for a few kanks. With the immediate threat of Happs and his bandits gone, the trading post is likely to start expanding as more people come through the area. Jhod Kavken, who arrives after the PCs, is a elemental cleric of Earth who arrives after the PCs, seeking some moral calm after lynching someone who accidentally turned out to be a Defiler. He might ask the PCs to seek out and clear the Temple of the Rock Drake, later. B. Warrior's Cairn: This cairn once housed a powerful lieutenant of one of the Champions of Rajaat, dating back to the Cleansing Wars. Their body bears a ring of life-shaped wood, but nothing else about the body is usable- the armour has long sinc rotted away, and only a few flakes of rust hint that they were once honoured enough to be buried with a metal weapon. C. Trap-filled gorge: A local wildlife trapper by the name of Breeg Orlivanch has littered this gorge with sharpened spikes made from bone and wooden poles tied together, as well as others hidden under the sand. D. Bokken's Hut: Bokken is a hermitic druid, one who would like to be left alone. So long as no-one is actively damaging his chosen lands, he suffers visitors, and might ask them to go and bring him Fangberries, so that he can craft better potion-fruits. He would like the Verdant Belt to become a safer place, and is happy to become a dependable source of potion-fruit in the region. E. Dead Trapper: Since faerie dragons aren't a thing in Athas, this gives a good opportunity to reinforce the world's deadliness. A nest of speckled Hurrum beetles (able to distract their prey with psionics) nearby the dead trapper might give PCs a hint of what caused Orlivanch to fall afoul of his own traps. F. Meenlock Nest: A pair of Meenlocks have a small nest high in a cactus grove here, replacing the faerie dragon Perlivash and the grig Tyg Titter-Tut. These are vicious predators that will steal from or harm the PCs a little at a time, and will attack or abduct a helpless PC if they ever have a chance, trying to drag them away to area O to transform them into more of their twisted kind. G. Cactus Grove: This grove of health cacti can be eaten for sustenance and absorbed water. A swarm of 3 Baazrags, stuffed to bursting with the moist flesh of the cacti, can be found here the first time the PCs arrive. While still dangerous, they're stuffed and have disadvantage on their attack rolls and saving throws. H. Centipede's Nest: This area, strewn with chewed and shattered bones, hiddes the lair of a gigantic centipede, about 20 feet long and able to lash out with incredible swiftness, carrying prey back into its deep hole. At the bottom is one of the Sun Lord's bandits, well-chewed but carrying a carved-bone emblem depicting his mask and with a scrawled map to the treasure buried in area M. I. Hot Springs: This area of sulfurous hot springs hosts a pair of warty-skinned giant frogs, with a psionic power to cause their victims to become incredibly thirsty. They prey on any creatures approaching the springs, hoping to drag them under the water and drown them. J. Temple of the Rock Drake: Surrounded by thorny growth for hundred of yards, the area is dominated by a boulder laboriously carved into the blunt likeness of a rock drake. Inside is a cleric of the elemental earth who desecrated the temple in times long ago, sacrificing the last of the elemental drakes and becoming a mutated elemental creature guarding this temple. If defeated, the pool of pure elemental dust can be used to treat wounds until the next sundown. Jhod Kavken might ask the PCs to clear the temple so that he can cleanse it and take up residence here. K. Bandit Camp: Detailed later. L. Gold Mine: This area can be used to set up a gold mine, which can be sent back to Tyr (or another city) to buy resources. Although gold is not a terribly useful metal on Athas, it is still valued for jewelery and decoration purposes, as well as forging magical items. M. Forgotten Cache: Here, one of the Sun Lord's bandits buried some treasure stolen from a Defiler they killed, before falling victim to the giant Centipede in area H. The treasure consists of a fine obsidian dagger, a bone ring (nice, but not magical), a wand of Burning Hands, and a spellbook with the rotted remains of several spells (which might allow a PC to learn the arts of arcane magic if they want to multiclass). N. Clear Pool: A small pool of pristine water seeps up from beneath the earth here, surrounded by lush vegetation. If the dangerous stranglevines are cleared away, the water can be drunk, and it is absolutely pure- those who drink it are fully refreshed, and gain inspiration, if they do not have it. However, the waters are muddied and consumed quickly, and so only about ten creatures can gain this benefit over the course of a month. After this, the water level has dropped down to below the ground, and the vegetation begins to wilt. Anyone Defiling this area will gain great benefit, but the spring will never flow again. It must be kept safe from desecration. O. Meenlock Lair: This area contains an old ruin in an area undermined by silt-flows and now fallen away. Here, a trio of Meenlocks have made their lair, and they transform any who fall into their grasp. P. Tuskgutter's Lair: Here, a vast Boneclaw Baazrag by the nickname of Old Tuskgutter makes its lair, isolated from others of its kind. The irritable beast attacks any creature that comes nearby, when it is not roaming the lands looking for a fight. Q. Rickety Bridge: The rickety bridge crosses a canyon thirty or more feet deep here, with near-sheer walls. Travelling out of the canyon requires travel of several miles in either direction, so the bridge is a valuable chokepoint. R. Gith Lair: This underground lair under a an ancient dead tress is infested by a tribe of Gith. This area is detailed in Section 4. S. Nettles' Crossing: Davik Nettles, once a ferryman who could convey travellers and bandits across the silt flats on his ferry, was murdered by the Sun Lord here and his hatred transformed him into a unique psionic undead creature. He can use his Levitate psionic power to float above the silt, and can be called by blowing one of the Inix horns at either end of the ferry-line. While maddened by hatred, he hungers for vengeance on the Sun Lord, and might be persuaded to spare and even assist the PCs in their journey. T. Dead Nightmare Beast: As a dead unicorn really doesn't fit Athas, I decided to go with something that can hint at the incredible power of Nyrissa, our 'campaign BBEG'. So a dead Nightmare Beast works well- it's spawned from new magic, something that didn't exist in the ancient times when Pyreen ruled the planet, and it's more evocative of how dangerous something must have been to overcome this creature the size of a Mekillot and clearly incredibly dangerous. However, that it's not rotting (in fact, having some grass growing from underneath its carcass might be weird enough to warrant investigation!), although one of its enormous tusks has been almost surgically sheared off should also draw some curiosity. This feels like enough of a clue to leave for later. U. Silt Crossing: This area has a known area of 'shallows' in the silt basins that criss-cross the Stolen Lands. However, these particular shallows are haunted by a pair of juvenile Silt Horrors- tentacled beasts that will attempt to drag down and suffocate any unwary adventurers. These are only small spawn, enough to bring down a human at their best. One of their previous prey was an adventurer and wanderer, whose pack contains a variety of gems and carved objects, as well as a valuable half-scale armour set and a map, tucked away in an old hollow bone tube, that can reveal some of the Stolen Land's secrets. V. Trapped Crodlu: A Crodlu has become trapped in a sinkhole here, and is exhausted and close to death from thirst. It will attack most creatures approaching, although the distance may allow a ranger or druid to befriend and free the poor animal. W. Fangberry Thicket: The thicket of Fangberries here are painful and difficult to harvest, but are also infested by several swarms of spiders, adding yet another hazard. The spiders are not harmed by the spines of the Fangberries due to their size, making them quite dangerous in this context. X. Silt Crossing: The silt basins come to a shallow area here, this one thankfully free of any Silt Horrors. Y. Halfling Village: This area is detailed in Part Five, but holds a small village of halflings who are at war with the Gith in Area R. They might be turned into allies (hopefully not slaves, unless you have some really nasty PCs). Z. Sun Lord's Fort: This area is detailed in Part Six. Tune back in next week for Part 3: The Bandit Camp! Also posted on Game Masters Stash on 11 September 2020. 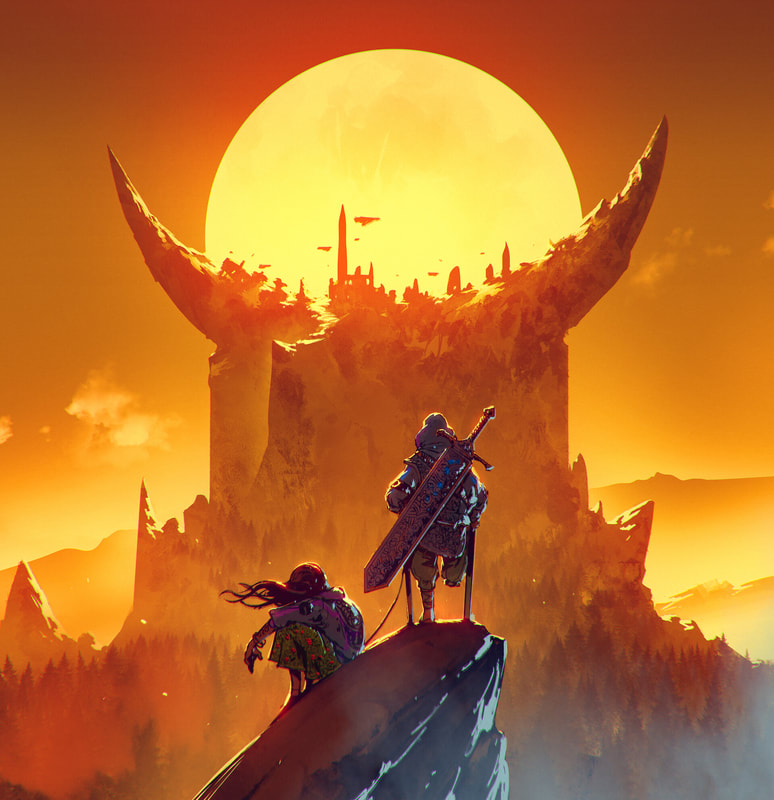 Art by ömer tunç, on ArtStation. Local legend says that the world once used to possess an additional moon, centuries ago. In times gone past, it crashed to the earth, and only its crescent remains now, atop the mountain it struck. There, a brother and sister founded the city that bears their name- Brul Shain, the Crescent City. Its silver-tipped towers gleam in the fading sunlight, and it is known as a haven in the wilderness, a welcoming sign to all those who see it.
The city is built on a curious structure on top of a mountain, with great 'horns' of stone stretching up hundreds of feet into the sky. Today, its ruler stays secluded in the highest tower, and a merchant council takes care of day-to-day business. Its guards wear simple cloaks of brown, and bear spears and bows to defend the wilderness around. The city is truly welcoming to those from outside, but the trade roads go through dangerous expanses, making it hard to reach. How you can use the Crescent City in your game: - Traveling to the Crescent City can be a fraught journey, and seeing the skyline of Brul Shain in the distance can be a sign that safety is at hand. However, not everything may be as rosy as the legends suggest- outside forces are massing to attack the city, and newcomers may be the only ones who can be trusted, if the forest guard have been corupted. - Deep into the mountain lurks an ancient evil, one that threatens to emerge when the time becomes right. The creatures that dwelled in the structure which crashed into the mountain are hungry from their long journey between the stars. - The current ruler's long absence from command is being noted, and it is said that some artifact left by the twin founders has ensnared their attention for the past few years. The Merchants' Council is willing to ask outsiders to venture into the Silver Tower to investigate, but this journey might be even more dangerous than traveling to the Crescent City itself. Also posted on Game Masters Stash on 2 September 2020. 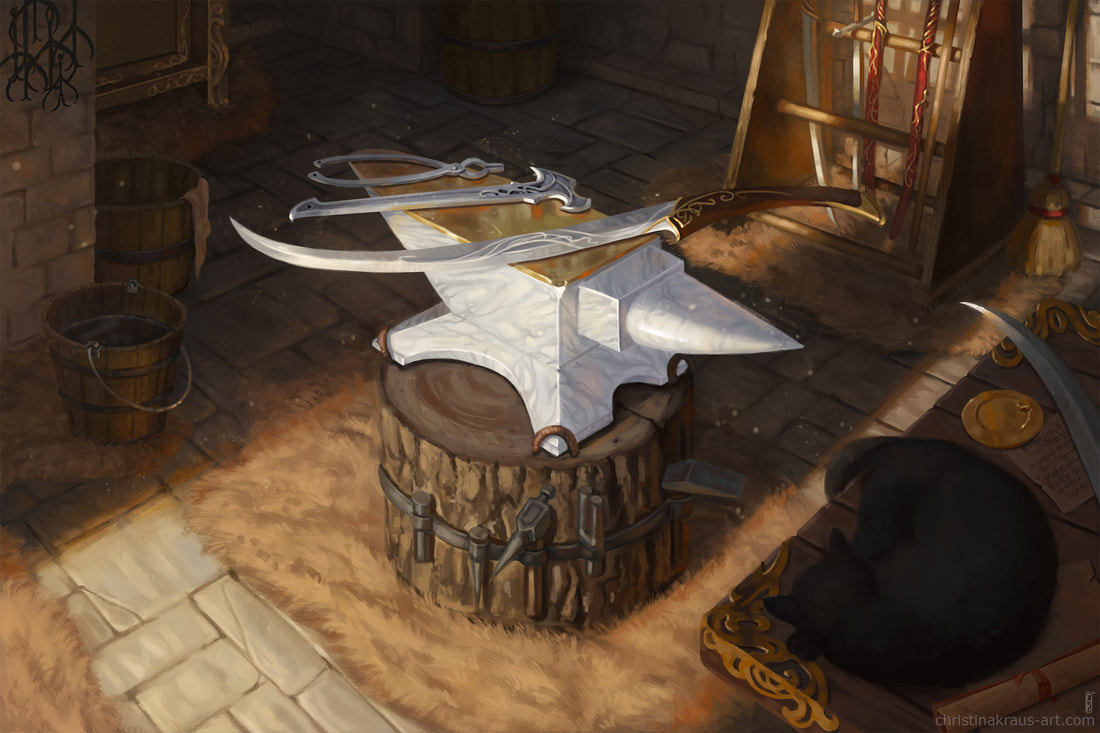 Art by Christina Kraus, on ArtStation. The Anvil of Legend, crafted of a single pure block of mithril and said to hold the heart of a star within its depths, is one of the finest artefacts ever. Every hammer-blow imbues objects crafted upon it with tremendous sorcery, with no need for an inelegant fire-based forge.
Most of the secrets it once held have been lost, but it is still used to create magical items, when the need is great. For now, it is under a sheet in an isolated tower, put aside until someone can find a use for it. How you can use the Anvil of Legend in your games: - Perhaps an enemy force has seized the tower, equipping their troops with rapidly-forged magical weapons. It must be taken back, but perhaps the regular army cannot be spared- adventurers will be needed. - For a PC whose magic [item] has been broken or destroyed, this might be a place they need to seek out to make a replacement. Perhaps the tower is now monster-haunted or has spiritual guardians to defend it. - If the tower is inhabited, perhaps the master-smiths have found that the star-heart at the centre of the anvil is finally dying. A replacement must be found before it dies altogether, or perhaps only one last mighty object can be made using its power. Also posted on Game Masters Stash on 29 August 2020. 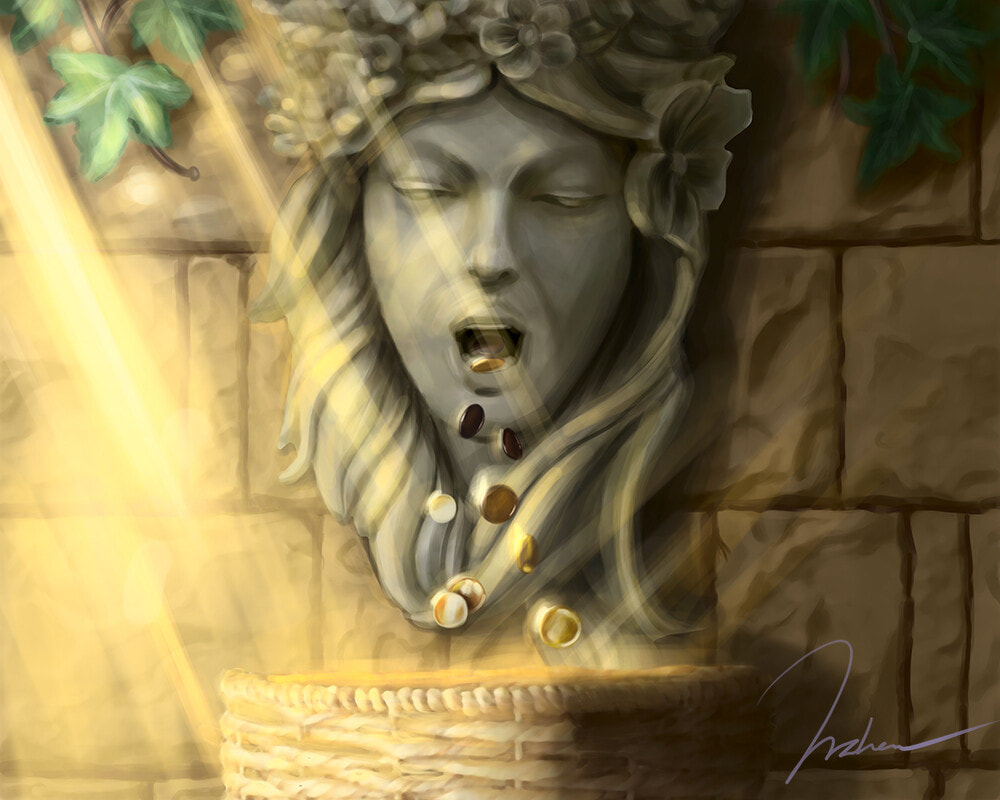 Art by Draken D., on ArtStation. The legendary fountain of Golden Plaza was gifted to the city by the Duveron family to demonstrate their incredible wealth. For nearly a century, hundreds of gold coins each day have tumbled forth from its mouth and into the sink below, where they vanish, unless someone takes them. The family has declared that all of the coins come from their coffers, and that they can spare so much of their wealth that they can afford the cost, and that any who need to partake of their bounty is welcome to it. The homeless have all built their own houses, the poor are well-off, and the Duveron family enjoys the love of all of the city. For now, most of the coins tumble unheeded, and all in the city want for little.
How you can use the Coin Fountain of Golden Plaza in your games: - Poor PCs who arrive in the city might be amazed by the incredible wealth on display, and almost-utopian happiness here. If they question how everyone is so comfortable, the smiling citizens direct them to Golden Plaza, where they can help themselves to some free coins. There are guards present in the plaza, but only to stop people fighting over the coins, and they gently help any PCs who need a hand. - If you want a darker turn, the utopian period might have been brief, and free wealth available might have led to rampant inflation, completely overturning the intended effect of the fountain. A constant riot is fought over the coins spilling from the fountain's basin, and the price of even simple supplies like a loaf of bread or a chicken has spiralled, putting it out of the reach of any but the most wealthy. The magic fountain has led to a city wracked by theft and violence, and undoing its magic might be the only way to bring the city back to any kind of balance. - The Duveron family, beggared by the constant flow of wealth generated by their ancestors, are desperate to undo the magic and cut off their losses. They surreptitiously seek out assistance in another city to undo the magic and save their legacy. Also posted on Game Masters Stash on 26 August 2020. 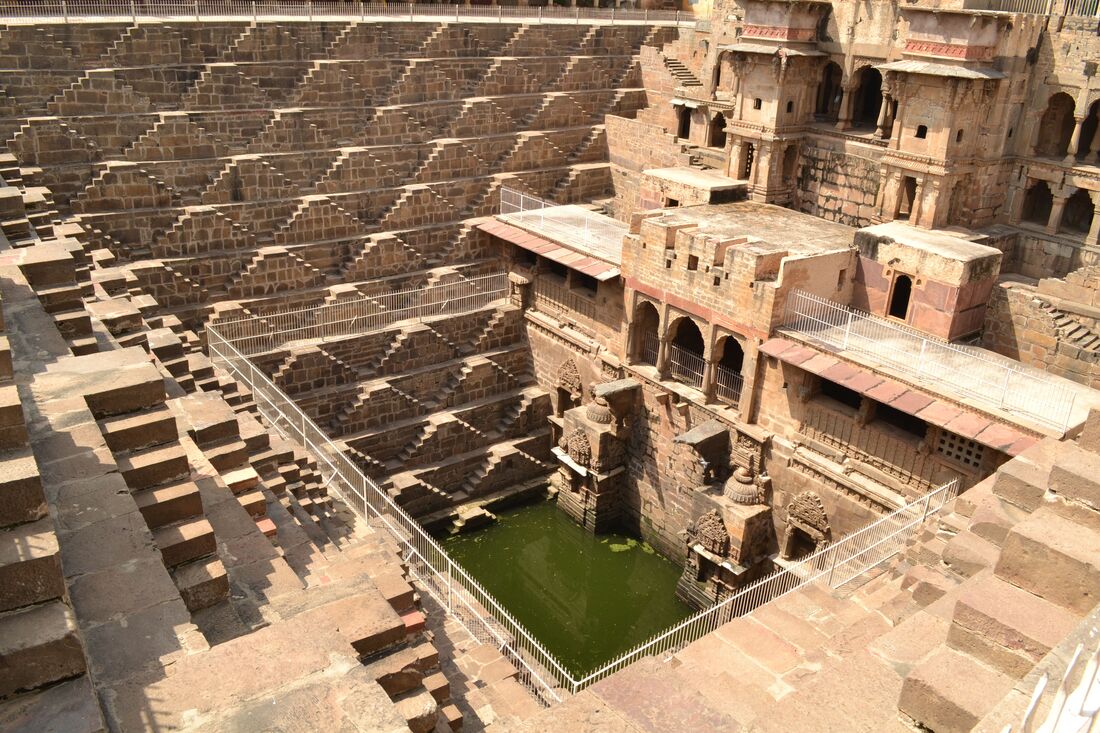 Chand Baori step well of Rajasthan, India. This vast complex was built over the reign of three successive kings, and drops a hundred feet below the ground's surface. Access to the well takes place over 13 flights of stairs criss-crossing from side to side, and one side of the complex is made up of a temple of local pink sandstone, a place of worship for pilgrims and royal courts. Its artwork and architecture have known no equal for centuries, and it is said that the well's waters have healing properties. Within the temple is another, private, well allowing exclusive access to those who pay for the privilege.
Within the well's depths, nearly another hundred feet below the surface of the water, a scheming beast makes its lair- a dread Morkoth. Making its lair there, the creature has manipulated pilgrims and royalty alike for hundreds of years. Also posted on Game Masters Stash on 19 August 2020. 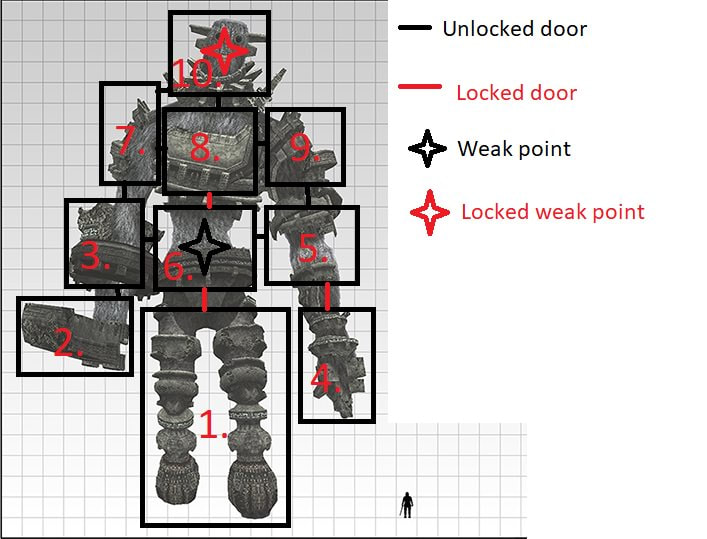 Art, as far as I can tell, by Reddit user u/DeathMcGunz. Going into a nearby cave system or mysterious underground death maze is fine, I guess. But for a really unforgettable 'dungeon', try shaking things up a bit. You can literally invert the concept- remove the walls and roof, and sometimes even the floor. You can stage encounter rooms vertically. You can have a dungeon that takes place entirely in someone's dreams- it's up to you!
So, how do you do this? The 'easy' version is a rooftop battle, taking place on a variety of flat topped-roofs joined by bridges or ramps or ladders. An example of this is playing the rooftop missions in Inquisitor: Martyr, which I'v been playing a bunch recently. Some rooftops might be close enough to have fierce ranged battles across the gaps between them, or allow characters who have some kind of flight ability to travel between them, disrupting opponents' tactics. Falling off might mean certain death, or it might mean plunging to the alleys below, taking 1d6 of damage. If you want to make the stakes higher, roll 1d6 to see how many storeys down the person falls, inflicting the appropriate amount of damage, and maybe taking them out of the immediate fight, or maybe only temporarily incapacitating them. This lets you still write your dungeon using a basic dungeon map, you're just pushing it out and removing all the 'blocks' where the walls would be. For a more intriguing battle, fighting your way up the interior (or exterior!) of a rampaging colossus, trying to immobilize some limbs to prevent property damage, or unlock pathways to other areas which might let you stop the colossus in its tracks altogether. On the way, you might have to battle infesting creatures within the structure, improbable death traps caused by whirring gears or jets of steam/fire. In this instance, you can still keep your standard dungeon rooms, you're just turning them so they're stacked, rather than all on the same flat plane. For more disconnected dungeons, like the Fade quest in Dragon Age, you can abstract all of that "euclidian geometry" and "physics" and "reasonable sense" garbage. Look at it like you're reading Alice in Wonderland while tripping on LSD. Sure, touching the teapot makes you enter the vast and cavernous Teapot domain where you have to battle the Walrus of Dantioch, while entering the hedge maze might trigger the battle where each of you becomes a mouse and struggles against the Pits of Sadness. Nothing has to make sense, and you can skip from encounter to encounter without having to worry about any specific interactions- each one is a separate domain which can't influence the others. I hope this gives you some ideas to work with! Also posted on Game Masters Stash on 3 June 2020. 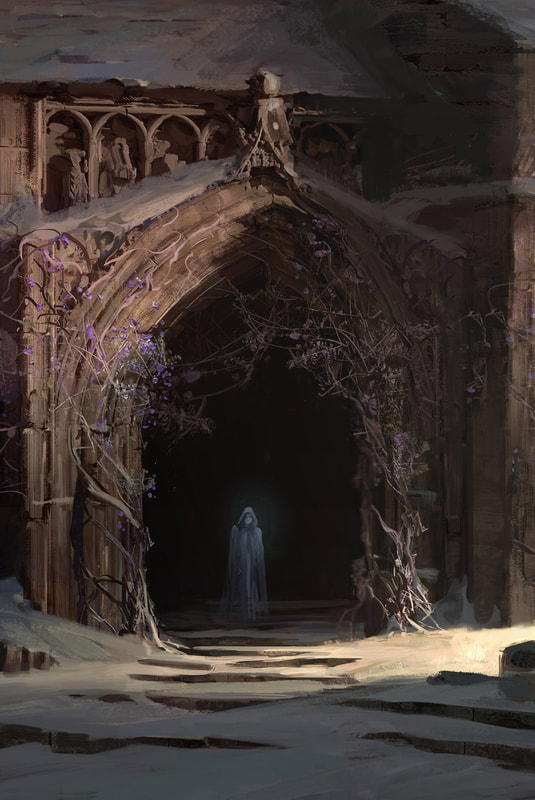 Art by Leonardo Borazio, on ArtStation. The Chapel of the Martyred Lady has always had an odd reputation, but now it stands all but abandoned. Only one soul still inhabits it, although her contribution to the church's work is reduced somewhat these days...
Raised almost two hundred years ago to one of the good deities, the Chapel of the Martyred Lady strove to emulate a saint of the faith who was unjustly slain at the hands of a wicked king. However, catastrophe and tragedy undercut the success of the chapel from its first consecration, when one of the bellringers stumbled and was hanged on striking the first peal of the bells. Although many members of the chapel's congregation tried valiantly to keep the congregation up, it faltered and was abandoned. Around fifty years ago, it was cleared of local bandits who had set up inside it, and reconsecrated, but the priestess who started this endeavour was murdered atopher own altar one night. No-one ever claimed responsibility, and the chapel was quietly abandoned again. It is now falling into ruin, as some of the leadlights have been shattered by thrown stones, and the roof is sagging and broken in places. On walking into the nave, however, an air of quiet peace can be felt. The dust motes in the shafts of sunlight coming though the roof holes seem atmospheric and almost welcoming. And a pale presence sometimes makes itself known, silently setting bones and closing wounds with a ghostly touch. At her neck she wears a holy symbol depicting the Martyred Lady, although her veiled face seems contorted with pain. How you can use the Chapel of the Martyred Lady in your game: - A low-level party might seek refuge in the chapel on the way to or from an adventure, especially if they need assistance and sanctuary from enemies. The Lady might even point them to a clue about her murderer, if they are faithful and respectful. - The PCs might be hired to 'clear' the chapel of the Lady's spirit so it can be reopened, and although they may be able to solve her murder at the hands of a young street thug who is now very aged and much more influential, finding out why he murdered her will be another quest altogether. - If the PCs become trusted allies of the Lady, it might help her to remember more of her life, and why she was murdered. She might become a friend who can assist in spiritual matters, in more ways than one. Also posted on Game Masters Stash on 27 May 2020. 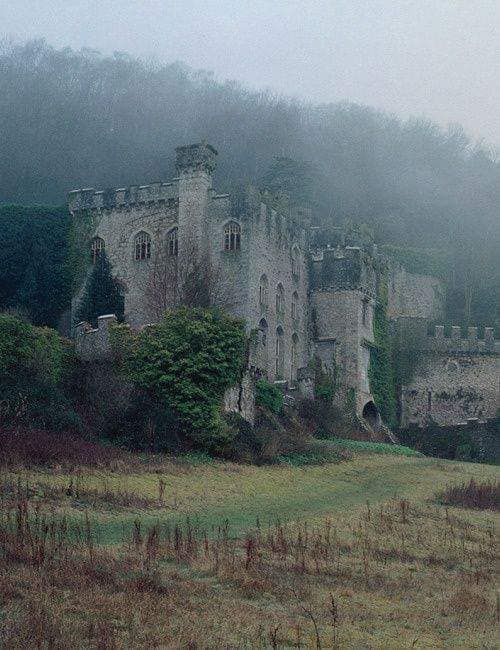 Gwyrch Castle, in Conwy County Borough, Wales. Greycrag Keep, ancestral home of the alDayne noble family, is a proud fortress nearly twenty centuries old. It has been the seat of loyal Dukes, the refuge of outcast kings, and the base of rebel forces over its ancient history. It is a great, slab-sided building with many defensive emplacements.
It is now the home of the Lord Protector of the West, one of the fragments of old Toranath. It does not possess the staff numbers that it used to, and its corridors are somewhat cold and drafty of late. It keeps a fortified core at the heart of the West Baronies, though, and has been used to shelter refugees long enough for aid to arrive on many occasions. Ownership: The current Lord Protector of the West is a grim woman by the name of Ethendra Morgaeden, a warrior who has fought to keep her position many times and defended the West Baronies from invasion and civil war for all of her reign. She is tough and fair, and has a soft spot for those who evoke the old glories of Toranath, and is willing to set quests for those who are willing to defend what she holds. Also posted on Game Masters Stash on 1 May 2020. 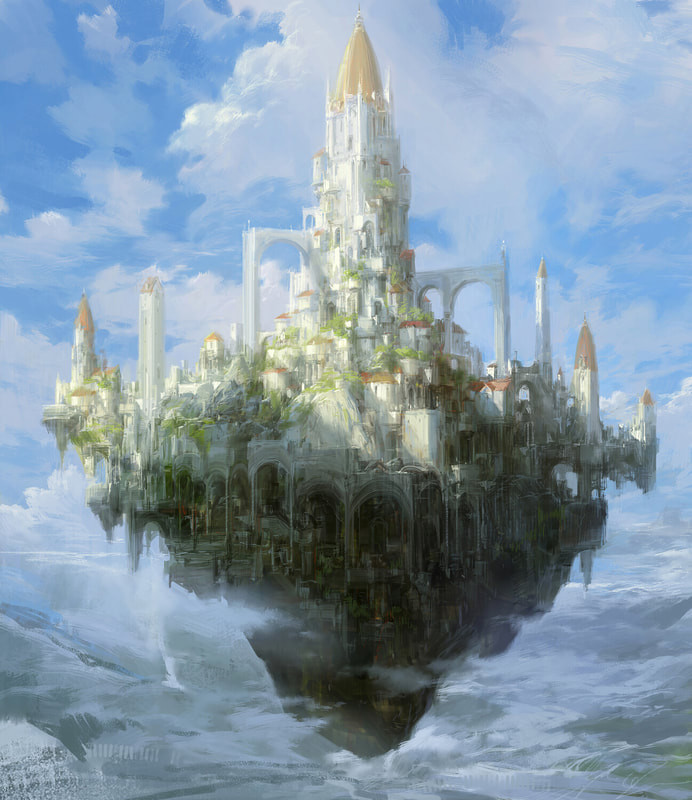 Art by JaeCheol Park (Paperblue) on ArtStation. L'Palais du Nuages, the fabled Palace of the Clouds, is something of a legend among treasure-hunters. It was built by the Elven Queen a millenium ago, took to the skies with her entire court and several thousand citizens, laden with the wealth of an entire dynasty, and then... was never seen again.
Stories tell of treasure hunters who just barely spotted it through the clouds one day. Some swear they saw it tethered to a distant mountain, others over trackless seas, none can say where exactly, or find it again. They say it is crewed by a court of ghosts, by wrathful spirits, by immortal elves, or even by other creatures who have commandeered the Palace. They all say it overflows with gold, jewels, and dripping finery. How you can use L'Palais du Nuages in your game: - Glimpsing the mighty Palais through the clouds overhead might be a an early foreshadowing you can use easily. It is flying hundreds of feet overhead, and cannot be reached easily, even with magic. It vanishes behind clouds quickly, and leaves people with a sense of wonder. - The Palais is seen overhead of a major kingdom, and a wave of small specks jettisons from it, an army of stone Gargoyles hurtling forth to pillage below. The attack can be staved off, but the flying fortress is gone before pursuit can be mounted. - Locating the Palais is quite a quest, and fighting through its magical defenders a complicated venture. No living inhabitants can be found, but at its centre is its Queen, entombed in a crystal casket and surrounded by the looted wealth of ages. Also posted on Game Masters Stash on 28 March 2020. 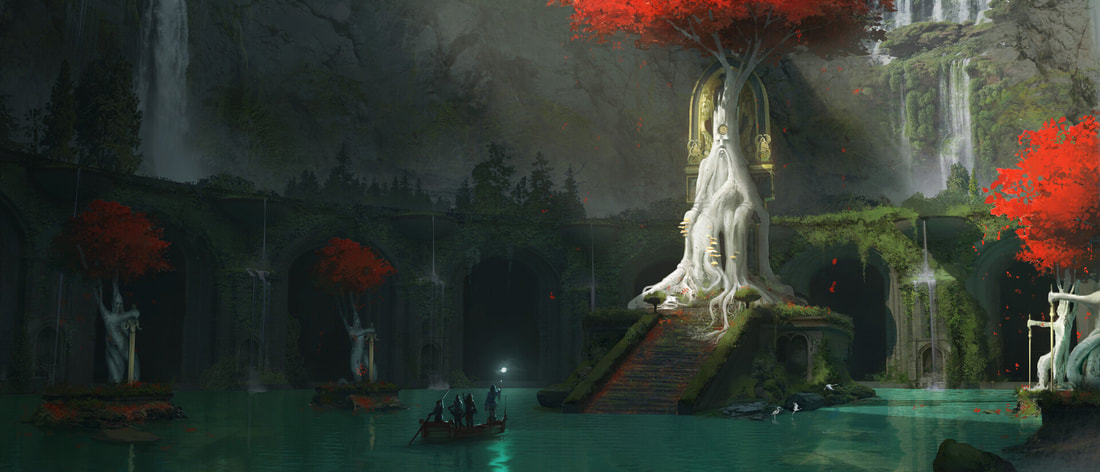 Art by Wesley Griffith, on ArtStation. The stories of the kingdom of Phezalan tell of its grand court, a soaked garden containing its only throne, on which an ancient and giant tree grows. The tell that King Zalan loved his people so well that he traded his life for the wisdom of the sylvans, and became one of them. This is why the kingdom has had thirty-eight regents, and only one king.
Those who would seek the wisdom of the Grandfather Sylvan can make a journey on a small gondola into the lovely court, and ask him three questions. He can be stirred from his rest less and less often over the years, however, and there are some who whisper that they have glimpse a blight within the depths of his roots, and that his days may be numbered. The Grandfather's court is guarded by six Sylvan Knights, his bravest and boldest who followed him in the Sylvan change. They have become warrior-Dryads, but have rarely been needed, and mostly slumber as white birch trees. King Zalan himself is a mighty Treant, and his kingdom prospers and is at peace with the land. How you can use the Grandfather Sylvan in your game: - A native of Phezlan might think it strange that kingdoms do not change their names along with their Kings and Queens- after all, Phezalan is named after its one and only king, who reigns still. Their people are at home with Fey spirits, and the bargain they have is honoured by other Fey elsewhere. Usually. - Travellers to Phezalan might be brought to the Grandfather Sylvan if they need specific advice, or if they have committed a deed which requires royal judgement. The Grandfather Sylvan might even be able to give them answers to questions which regular sages cannot. - The rumours of blight spreading might be true. Perhaps Blights themselves have begun to burrow from beneath the roots of the kingdom, and adventurers will be needed to find a new seed, one who can take up King Zalan's legacy and keep the peace with the Feyfolk. Also posted on Game Masters Stash on 28 March 2020.  Art by Jake Parker, at his own blog, Misterjakeparker.com . Interesting world design is more than just making a map and throwing some Orcs on it. You need to start from the ground up. Or sometimes, even deeper than that!
While sticking with some variation of our world's physics is useful and makes storytelling easier, you can add in some magic and really make your world unique! The above picture is from Jake Parker's Skyheart series, a comic series set in a world with strata layers (like an Ogre... or an onion)., which is fantastically evocative, and really inspires some fun design. The series has magic, winged people, flying whales, and airships, and on seeing this picture, I was immediately struck by the idea and wanted to explore it- the different layers, the different flying continents, and the different peoples that inhabit it. If you can find an idea that makes your players sit up and cock their heads at it when they see it, trying to figure it out and find out what's inside, you're doing great. So test it out with a friend- show them your idea and see what they think. If you can sell one person on the idea, you've got a start! And if they've got some feedback, take it onboard. You've got a bunch of time right now, what are you waiting for? Also posted on Game Masters Stash on 26 March 2020. |
AuthorI'm Luke. He/him pronouns. Archives
May 2022
Categories
All
|
 RSS Feed
